That persistent ching-ching isn’t just loose bolts—it’s a symptom of hydraulic system intolerance where microscopic misalignments create a tolerance stack-up.
- Mount standards dictate your adjustment range: Post Mount allows lateral play, Flat Mount demands precision facing.
- Piston synchronization matters more than bolt torque; uneven extension causes chronic rotor drag.
- Air bubbles in the line mimic mechanical failure, causing wandering bite points that feel like misalignment.
Recommendation: Before touching an adjustment knob, diagnose whether the issue is mechanical alignment, hydraulic integrity, or piston contamination.
You know the sound. It starts ten minutes into your commute—a rhythmic metallic whisper that grows into a maddening ching-ching with every wheel revolution. You have tried loosening the caliper bolts, squeezing the lever, and retightening. You have tried bending the rotor. Yet the rub returns. The frustration stems from a fundamental misunderstanding: disc brake alignment is not a single adjustment but a precision system where mount geometry, piston kinematics, and hydraulic integrity converge. Most riders chase symptoms instead of addressing the tolerance stack-up—the accumulation of micro-imperfections across these subsystems. Whether you ride a flat-mount road bike or a post-mount hardtail, the principles of silence remain the same. We will examine how mount standards define your adjustment limits, why piston synchronization trumps bolt torque, and how pad material choices influence long-term alignment stability. By treating the caliper as a precision instrument rather than a clamp, you can eliminate that noise permanently.
To silence your brakes systematically, we need to move beyond quick fixes and understand the mechanical relationships at play. The following sections break down the diagnostic and repair process into eight critical domains, from identifying your mounting standard to verifying hydraulic integrity.
Table of Contents: Precision Caliper Alignment for Noise-Free Braking
- Post Mount vs Flat Mount: Identifying Your Standard
- How to Clean Brake Dust Without Damaging Seals
- 2-Piston vs 4-Piston: Do You Need Downhill Power for Commuting?
- The Risk of Pushing Pistons Out Too Far When Pads Are Removed
- Rebuild or Replace: When Calipers Are Beyond Saving
- How to Mobilize Pistons Without Leaking Fluid
- Leather vs Synthetic: Abrasion Resistance for Pavement Falls
- Hydraulic Bleeding 101: Signs You Have Air in the Line
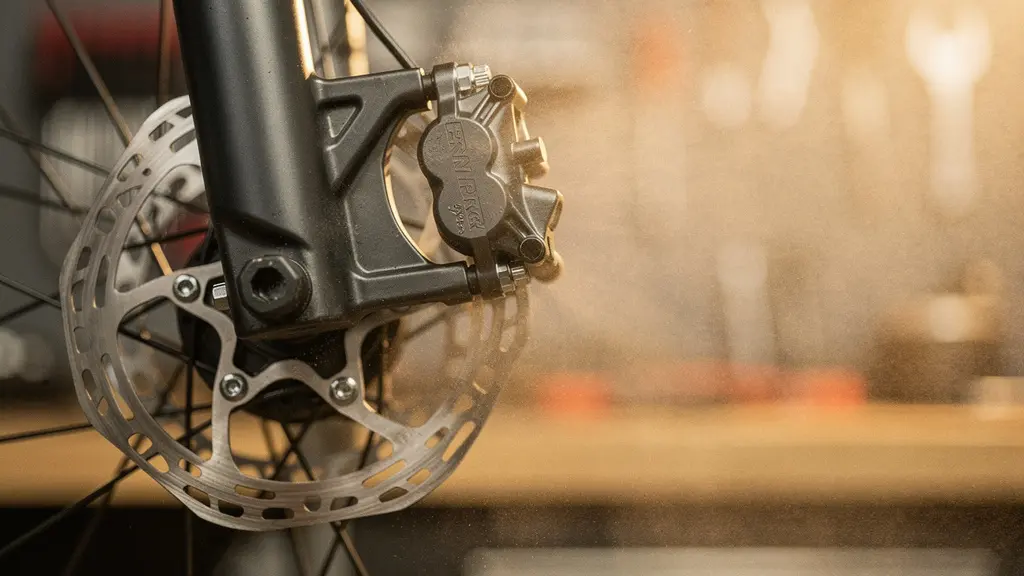
Post Mount vs Flat Mount: Identifying Your Standard
Before reaching for a hex key, identify your mounting interface. The two standards—Post Mount and Flat Mount—offer fundamentally different adjustment philosophies. Post Mount uses 74 mm bolt spacing with slotted caliper bodies, allowing lateral movement to accommodate minor frame imperfections. Flat Mount, with its 34 mm spacing, bolts directly into the frame or fork with significantly rigid mounting that offers minimal wiggle room. This rigidity demands that the frame mounts be professionally faced; without proper facing, the caliper sits twisted, and no amount of bolt torque will achieve parallel pad contact.
| Feature | Post Mount | Flat Mount |
|---|---|---|
| Bolt Spacing | 74 mm | 34 mm |
| Lateral Adjustment | Slotted holes on caliper body allow side-to-side movement | More rigid mounting; bolts thread into caliper from frame |
| CPS / Conical Washers | Available for fine-tuning perpendicular alignment | Not applicable |
| Mount Facing Criticality | Moderate — slots compensate for minor imperfections | High — tighter tolerances demand properly faced mounts |
| Typical Use | Mountain bikes, older gravel/road frames | Modern road, gravel, and XC bikes |
| Adapter Compatibility | Wide range of rotor-size adapters | Limited; front fork requires mounting bracket |
| Weight | Slightly heavier due to larger mount tabs | Lighter, more integrated design |
| Typical Bolt Torque | 6–8 Nm (caliper-to-adapter or caliper-to-fork) | 6–8 Nm (caliper bolts into frame/bracket) |
When using adapters—particularly mounting a Post Mount caliper to a Flat Mount fork via a Shimano-style bracket—you introduce adapter tolerance stack-up. Forum mechanics documented a case where a post-mount TRP caliper on a flat-mount fork produced persistent rubbing despite true rotors. The culprit was out-of-spec flat mount surfaces combined with the adapter interface, resolved only by facing the mounts with a Park Tool DT-5.2. If your alignment efforts feel futile, suspect the interface geometry before blaming the caliper.
How to Clean Brake Dust Without Damaging Seals
Sticky pistons are the invisible cause of chronic brake rub. When one piston advances faster than its partner, the caliper body shifts slightly with each brake application, creating intermittent rotor contact. The root cause is often microscopic: brake dust and oxidized fluid residue create friction against the piston seals. Cleaning this requires precision—harsh solvents can swell EPDM seals, while metal tools can scar the piston surface, creating new leak paths.
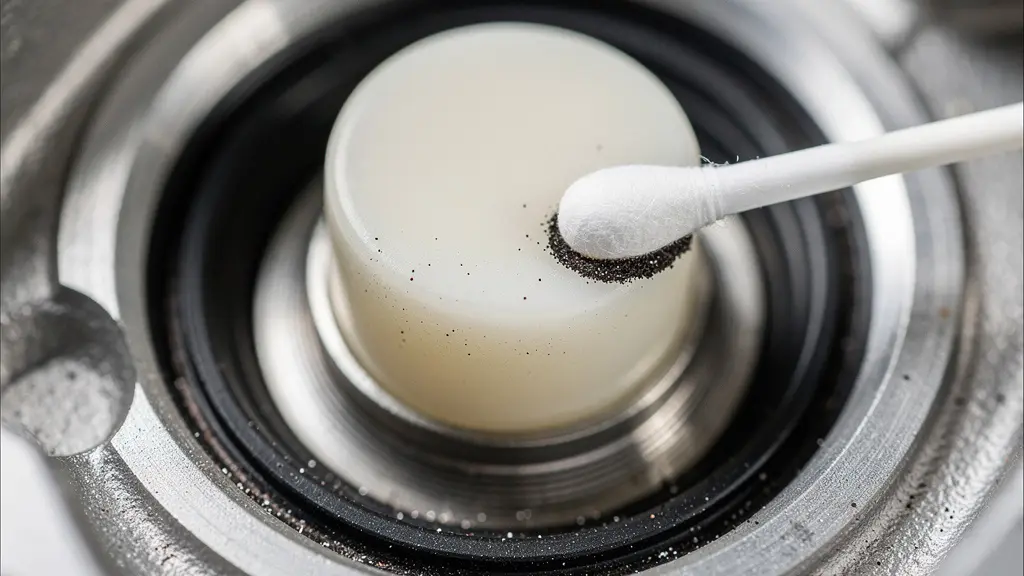
The cleaning process focuses on the piston-seal interface. Extend the pistons partially, exposing the cylindrical surface without removing them from the bore. Use isopropyl alcohol and a soft toothbrush or cotton swab to lift the dark ring of dust where the piston meets the seal. Avoid brake cleaner spray directly on the seal; while effective at dissolving grease, it can degrade rubber over time. Always push pistons back using a plastic or wooden tool—never metal—to prevent scratching the anodized surface.
Your Action Plan: Piston Cleaning and Mobilization Cycle
- Remove the brake pads and retaining hardware from the caliper.
- Gently pull the brake lever a few times to extend the pistons slightly — observe whether they advance evenly or one lags behind.
- Use a toothbrush or cotton swab with isopropyl alcohol to clean the exposed sliding surfaces of each piston, removing brake dust and grime.
- Blow away loosened debris with brake cleaner spray; avoid soaking the seals with harsh solvents.
- Carefully push the pistons back into the caliper using a flat tool made of soft material (plastic or wood) — never metal.
- Repeat the extend-clean-reset cycle until all pistons move smoothly and synchronously.
- Reinstall the brake pads, insert the bleed block or pad spacer, and verify even pad-to-rotor clearance.
Comme le montre ce schéma détaillé, la propreté du joint d’étanchéité est primordiale pour le retour élastique des pistons. Une fois le nettoyage terminé, vérifiez que les pistons avancent et reculent de manière symétrique avant de remonter la roue.
2-Piston vs 4-Piston: Do You Need Downhill Power for Commuting?
The number of pistons in your caliper directly impacts alignment complexity. A 2-piston system requires synchronizing two moving parts; a 4-piston system must coordinate four. For commuters dealing with stop-and-go traffic, the question isn’t stopping power—it’s maintenance predictability. While 4-piston calipers offer superior thermal mass and modulation for long descents, they introduce more potential failure points where dust or corrosion can cause uneven piston advance.
| Attribute | 2-Piston Caliper | 4-Piston Caliper |
|---|---|---|
| Stopping Power | Adequate for XC, gravel, commuting | Superior — more force and contact area on rotor |
| Heat Dissipation | Lower — smaller pads and caliper body heat up faster | Higher — larger surface area acts as a bigger heat sink |
| Weight (e.g. Shimano SLX) | ~280 g per caliper | ~299 g per caliper |
| Modulation | Good — intuitive for lighter braking demands | Excellent — more progressive feel under high loads |
| Alignment Complexity | Lower — 2 pistons to keep synchronized | Higher — 4 pistons must advance and retract in sync |
| Maintenance | Simpler — fewer seals and pistons to clean | More involved — more seals, greater chance of sticky piston |
| Ideal Use | Cross-country, road, gravel, commuting, light e-bikes | Trail, enduro, downhill, e-MTB, cargo bikes |
| Brake Fade Resistance | Lower on sustained steep descents | Significantly better on long alpine-style descents |
Consider the weight penalty: there is only 19 g difference between Shimano SLX M7100 2-piston and M7120 4-piston rear calipers. The real cost is maintenance time. If your commute involves moderate hills rather than alpine descents, a well-maintained 2-piston system offers simpler alignment and less frequent piston cleaning, reducing the likelihood of that persistent rub.
The Risk of Pushing Pistons Out Too Far When Pads Are Removed
During pad replacement or cleaning, the temptation to pump the lever for piston inspection is strong. Without the physical stop provided by brake pads or a bleed block, pistons can overextend catastrophically. In a 2-piston caliper, this means potential ejection from the bore; in a 4-piston system, the inner pistons often overextend first due to fluid dynamics, creating uneven pressure that cracks the caliper body or destroys seals.
The physics are simple: hydraulic systems generate immense pressure. When you pull the lever with no resistance, pistons travel until they hit the end of their mechanical limit or pop out entirely. If a piston overextends, do not force it back with pliers. Instead, gently open the caliper bleed port to release system pressure, then use a plastic tire lever to ease the piston back into the bore. Forcing a pressurized piston damages the square-section seal that maintains hydraulic integrity.
Prevention requires discipline. Always insert a bleed block or an old set of pads before pulling the lever with the wheel removed. If you lack a bleed block, create a DIY spacer from cardboard folded to the thickness of your rotor plus pads. When extending pistons intentionally for cleaning, use short, controlled lever strokes—never full pulls. Observe the pistons carefully; when one begins to move faster than its partner, stop immediately and reset.
Rebuild or Replace: When Calipers Are Beyond Saving
Not every rubbing issue resolves with cleaning or alignment. Sometimes the caliper itself suffers terminal damage. Persistent fluid weeping from the piston bore—not the bleed port or hose fittings—indicates internal seal failure or corrosion pitting on the piston surface. Deep scratches or oxidation prevent proper seal contact, causing the piston to “creep” and maintain constant rotor contact. Similarly, stripped mounting threads or a cracked caliper body from crash impact render the unit irreparable.
However, many riders condemn calipers prematurely. A 20-month real-world test of SRAM Maven brakes across park laps and alpine descents revealed that wandering bite points and uneven pad wear—symptoms often blamed on “defective” calipers—were almost always resolved by thorough piston massage (the extend-clean-lubricate cycle) and proper bleeding. The study found that neglecting piston maintenance caused predictable lever feel degradation that mimicked hardware failure.
Economically, rebuild kits make sense for mid-to-high-end calipers. A seal kit costs under $20, while replacement calipers run $60–$150+. If the caliper body is not warped—verified by checking light leakage under a precision straight edge across the pad faces—rebuilding restores full function. Warped bodies, caused by overheating or impacts, cannot be straightened; replacement is mandatory as no alignment adjustment compensates for twisted pad faces.
How to Mobilize Pistons Without Leaking Fluid
When one piston advances while its partner lags, you experience the classic “piston drag” that causes persistent rubbing. The solution is isolated mobilization—forcing the lazy piston to cycle independently while its siblings remain stationary. This technique requires blocking the active pistons with a plastic tire lever or pad spacer, then applying gentle lever pressure to extend only the problematic piston.
The pistons inside the calliper need to move in and out smoothly and evenly, and tiny amounts of grit, pad dust or uneven seal tension can cause one or two of them to drag.
– Flow Mountain Bike editorial team, Living with SRAM Maven brakes: 20 months of real-world experience
Once isolated, extend the sticky piston fully, clean its exposed surface with isopropyl alcohol, and apply a micro-drop of the correct system fluid—mineral oil for Shimano/Magura, DOT for SRAM/Hayes—to lubricate the seal interface. Push the piston back gently and repeat the cycle until movement matches the other pistons. Never use generic oils or grease; compatibility is critical for seal longevity. After synchronization, verify that all pistons advance simultaneously when you pull the lever with the pads installed.
Leather vs Synthetic: Abrasion Resistance for Pavement Falls
While protecting your hands during a fall matters, the materials contacting your rotor matter more for daily alignment stability. Brake pad compounds—analogous to leather (organic) versus synthetic (sintered) in their wear characteristics—determine how much debris accumulates in your caliper, directly affecting piston movement and noise levels.
| Characteristic | Organic (Resin) Pads | Sintered (Metallic) Pads |
|---|---|---|
| Material Composition | Kevlar, rubber, silica bound with resin | Metallic particles fused under high temperature and pressure |
| Noise Level | Quietest option | Can be noisier, especially when wet or hot |
| Initial Bite | Sharper — no warm-up needed | Requires brief warm-up; more progressive initial feel |
| Heat Management | Insulates caliper but prone to fade under prolonged braking | Excellent — resists fade on long descents |
| Wet/Muddy Performance | Poor — can glaze and lose effectiveness | Strong — mud and water do not accelerate wear |
| Wear Rate | Faster — requires more frequent replacement | Slower — significantly longer service life |
| Rotor Wear | Gentler on rotors | More abrasive — can accelerate rotor surface wear |
| Dust Produced | Fine, dark organic dust | Coarser metallic particles |
| Ideal Riding Conditions | Dry XC, road, casual commuting | Wet, muddy, aggressive trail, enduro, DH, e-MTB |
Sintered pads, like tough synthetic materials, withstand high heat and wet conditions but generate coarser metallic dust that accelerates piston contamination. Organic pads produce finer, lighter dust but wear faster, requiring more frequent changes that expose pistons to environmental debris. For commuters prioritizing silence over ultimate stopping power, organic compounds reduce the abrasive particles that cause sticky pistons, maintaining caliper alignment longer between services. However, if you ride in wet conditions, the glazing tendency of organic pads may force you toward sintered options despite the increased maintenance.
Key Takeaways
- Caliper alignment begins with mount facing and standard identification—Post Mount offers forgiveness, Flat Mount demands precision.
- Piston synchronization through regular cleaning and isolation techniques prevents the asymmetrical wear that causes chronic rubbing.
- Air in hydraulic lines mimics mechanical failure; always verify fluid integrity before condemning hardware.
Hydraulic Bleeding 101: Signs You Have Air in the Line
Spongy lever feel and unpredictable bite points often masquerade as caliper alignment issues. In reality, compressible air bubbles in the hydraulic line allow piston engagement without consistent retraction, creating the illusion that the caliper is misaligned. When you squeeze the lever on a system containing air, the bubbles compress unevenly, causing pistons to extend at different rates. The rotor appears to rub randomly because the pistons never return to a consistent neutral position.
Diagnostic differentiation is simple: if the lever feels mushy and the caliper seems to “pump up” with repeated strokes, you have air. If the lever is firm but the caliper visibly sits off-center, you have mechanical misalignment. A 20-month field test confirmed that wandering bite points—the phenomenon where engagement distance changes randomly—were almost exclusively caused by trapped air rather than caliper defects.
Overfilled systems can also cause rubbing. If fluid occupies too much volume in the reservoir, thermal expansion or lever compression forces pistons further out than designed, reducing pad-to-rotor clearance. When bleeding, always use the correct caliper spacer to set piston position accurately. Torque the hose banjo fitting to 8 Nm to prevent post-bleed air ingress. Remember that air bubbles mimic caliper failure, leading riders to chase alignment adjustments when the real fix is a proper bleed.
Frequently Asked Questions on Caliper Alignment
How do I know if my caliper is truly beyond repair versus just needing a service?
Terminal signs include persistent fluid weeping from the piston bore itself (not from fittings or bleed ports), deep corrosion pitting visible on the piston surface, or stripped threads on the caliper mounting holes or bleed port. If your issue is sticky pistons, spongy lever feel, or uneven pad wear, these are almost always serviceable through a thorough piston clean and bleed.
Is it worth buying a seal kit instead of a new caliper?
For mid-to-high-end calipers (e.g., Shimano XT/SLX, SRAM Code/Maven), a seal kit typically costs under $20 and can restore full function if the caliper body and pistons are undamaged. A replacement caliper costs $60–$150+. If the caliper body is not warped or corroded, rebuilding is almost always the better economic choice.
Can a warped caliper body be straightened?
No. A warped caliper body — caused by overheating or crash impacts — is an unfixable condition. You can check using a precision straight edge across the pad contact faces. If light passes under the straight edge unevenly, the caliper is warped and must be replaced, as no amount of alignment adjustment will compensate.
How can I tell if my brake rub is caused by air in the line or a sticky piston?
Perform a simple diagnostic: squeeze the brake lever and assess the feel. If the lever feels spongy or mushy AND the pistons are slow to retract, air in the system is the likely culprit. If the lever feels firm and crisp but you can visually see one piston lagging behind the others, the issue is mechanical — a dirty or seized piston requiring cleaning and mobilization, not a bleed.
Can a brake system with air give a false positive during the squeeze-and-tighten alignment method?
Yes. When you squeeze the lever on a system containing air, the compressible air bubbles allow the pistons to engage unevenly. The caliper may appear centered during the alignment procedure, but once you release the lever, the pistons fail to retract fully because the system cannot generate the slight vacuum needed for complete retraction. The result: the brake seems perfectly aligned but begins rubbing again immediately.
Can overfilled brake fluid cause rubbing that looks like a caliper alignment problem?
Yes. If brake fluid was overfilled during a bleed, the caliper pistons advance further than normal, reducing the clearance between pads and rotor. You can identify this by trying to push the pistons fully back into the caliper bore — if they resist strongly despite clean, mobile pistons, the system is likely overfilled. Use the correct caliper spacer during bleeds to prevent this.
Eliminate the ching-ching for good by treating your brake system as a precision instrument: identify your mount standard, synchronize your pistons, and verify your hydraulic integrity before every major season.