
The secret to endurance isn’t just about fitness; it’s about smart energy management for both you and your bike.
- Using the motor to stay in “Zone 2” heart rate builds stamina faster than pushing to exhaustion.
- Proper hydration and fueling are critical, even when the electric assist makes you feel less thirsty.
Recommendation: Start with a route planning strategy that incorporates vertical periodization to gradually increase your riding time without risking burnout.
Have you ever felt that sudden, crushing wave of exhaustion just 45 minutes into a ride, even with electric assist? You are not alone. Many novice cyclists believe that because they have a motor, they should be able to ride indefinitely. When they inevitably hit a wall, they blame their lack of fitness or feel like imposters in the cycling world.
The common advice usually revolves around “pedaling more” or “using Eco mode,” but these platitudes miss the physiological reality of endurance. We often overlook the fact that an e-bike is not just a tool for ease; it is a precision instrument for bio-feedback. By controlling the load, we can train the body’s metabolic efficiency in ways a traditional bike cannot for a beginner.
But what if the key to riding for three hours wasn’t about pushing harder, but about managing the invisible depletion of your body’s resources? In this guide, we will explore how to synchronize your body’s battery with your bike’s battery to unlock true long-distance potential.
text
The following guide details the structural approach to building this endurance, starting with the most critical biological barrier.
Table of Contents: Your Roadmap to Stamina
- Why “Bonking” is Less Likely on an E-Bike (But Still Possible)
- How to Pace Yourself for a 60-Mile Charity Ride
- Elliptical vs E-Bike: Transferable Endurance Skills
- The Mistake of Drinking Less Because You Sweat Less
- Gradual Elevation: Planning Routes that Build Stamina
- Why Using Your Phone for GPS Can Leave You Stranded
- Charging to 80%: The Secret to Doubling Battery Lifespan
- E-Bike Trekking Essentials: Packing for a 3-Day Self-Supported Trip
Why “Bonking” is Less Likely on an E-Bike (But Still Possible)
The “bonk” is cycling terminology for a hypoglycemic event where your muscles literally run out of glycogen. On a standard bike, a beginner might hit this wall within an hour of intense climbing. On an e-bike, the motor smooths out the power spikes that typically burn through glycogen rapidly, creating a safety buffer. However, this buffer can be deceptive.
Because the perceived exertion is lower, many riders forget that they are still burning calories. You might feel fine simply because your heart rate hasn’t spiked, but your fuel tank is slowly leaking. Science indicates that 90 to 120 minutes of glycogen reserves are typically all the body holds during moderate-to-intense activity. Once that timeline is crossed without refueling, performance drops off a cliff, regardless of your pedal assist level.
The cognitive dehydration phenomenon in e-bike riders
Cycling Weekly’s analysis reveals that riders on e-bikes often experience a ‘false security loop’ where perceived lower effort leads to reduced calorie consumption. The last thing we want to experience is the dreaded ‘bonk’ on an endurance ride, especially when far away from home, which becomes particularly dangerous when cognitive fog sets in around the 2.5-hour mark due to inadequate fueling despite the motor assistance.
To prevent this, you must divorce your eating schedule from your hunger cues. Hunger is a lagging indicator; by the time you feel it, it is often too late to recover during the ride.
Once you understand the fuel requires, you can apply this logic to a specific long-distance goal.
How to Pace Yourself for a 60-Mile Charity Ride
Pacing on an e-bike involves a unique duality: you are managing two batteries simultaneously—your body’s energy and the lithium-ion cell on your downtube. A successful 60-mile ride requires a strategy where neither battery hits zero before the finish line. The mistake most beginners make is relying too heavily on “Turbo” mode early in the ride, which drains the bike’s battery, leaving them to pedal a heavy machine with exhausted legs in the final miles.
To visualize this management, consider the interaction between your manual input and the digital assistance.
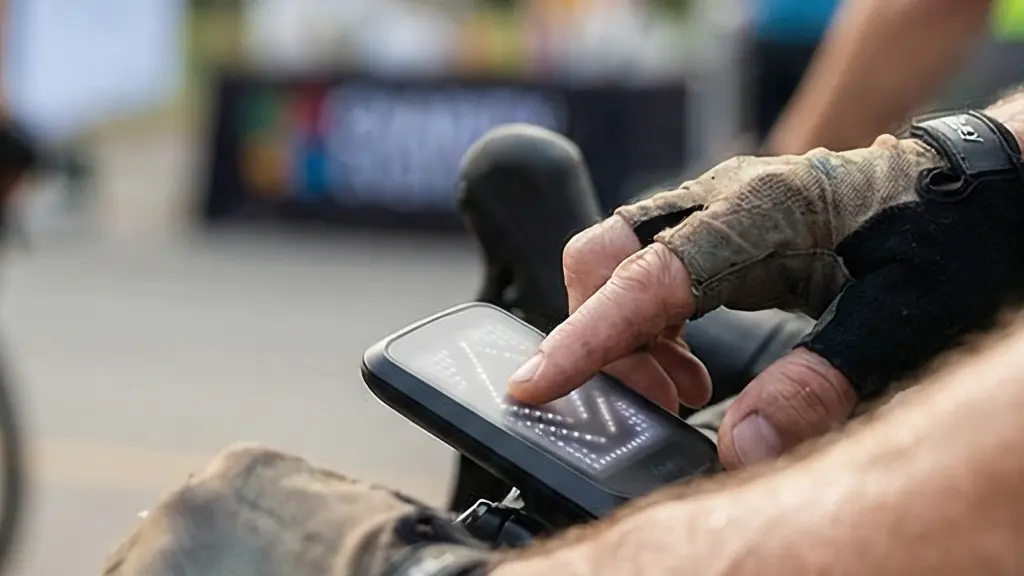
As illustrated, keeping a close eye on your assistance level is crucial. The goal is to use the motor to cap your heart rate, not to eliminate effort. This requires a progressive training approach.
A structured plan can help you gradually adapt to longer durations. Below is a progressive schedule that utilizes assist levels as a training variable, as detailed in a 6-8 week progressive training plan.
| Week | Distance | Primary Assist Mode | Heart Rate Target |
|---|---|---|---|
| 1-2 | 20 miles | Turbo (High) | 60-65% max HR |
| 3-4 | 30 miles | Tour (Medium) | 65-70% max HR |
| 5-6 | 40 miles | Eco+Sport mix | 65-70% max HR |
| 7-8 | 60 miles (full simulation) | Strategic mix per segment | 70% max HR ceiling |
Sometimes, the best preparation for long hours in the saddle happens in the gym, focusing on mental resilience.
Elliptical vs E-Bike: Transferable Endurance Skills
While specific cycling muscles are best trained on the bike, the mental fortitude required for endurance can be cultivated elsewhere. The elliptical machine offers a surprisingly effective crossover benefit for e-bike beginners. It mimics the constant, non-impact pedal stroke without the micro-breaks you get from coasting downhill or stopping at traffic lights.
Use the elliptical to train your brain for monotony. On a 3-hour ride, the scenery changes, but the physical motion does not. Learning to maintain a steady heart rate output for 45 minutes on a machine translates directly to the discipline needed to maintain a steady cadence on your e-bike, preventing the “surge and coast” habit that destroys efficiency.
As noted by experts in the field:
The mental discipline of sustained sub-maximal effort for 45-60 minutes on an elliptical trains the brain’s tolerance for monotony and discomfort
– REI Expert Advice, Endurance Cycling Training Tips
The wind generated by your speed can deceive your body’s natural thirst mechanisms, leading to a common error.
The Mistake of Drinking Less Because You Sweat Less
One of the most dangerous myths in e-biking is that you don’t need to drink as much because you aren’t sweating as profusely as a regular cyclist. In reality, the higher consistent speeds of an e-bike create a “wind chill” effect that evaporates sweat instantly. You are likely losing fluids rapidly without the tactile cue of dripping sweat to warn you.
Dehydration increases heart rate and perceived exertion, effectively cancelling out the benefits of the motor. Data indicates that even when riders feel dry due to wind evaporation, they can lose 500-800 mL of fluid per hour. Replacing this fluid is non-negotiable for rides exceeding 90 minutes.
Your Hydration Action Plan: Concrete Steps
- Points of contact: lister tous les canaux où le signal est émis
- Collecte: Drink 150-200 mL every 15 minutes regardless of perceived thirst.
- Cohérence: Start hydrating from minute zero, not when you feel thirsty.
- Mémorabilité/émotion: Use electrolyte drinks after the first 60 minutes to replenish salts.
- Plan d’intégration: Monitor urine color post-ride to assess hydration status; it should be pale yellow.
Hills are often the nemesis of beginners, but with an e-bike, they become a structured training tool.
Gradual Elevation: Planning Routes that Build Stamina
Instead of avoiding hills, use them to build what coaches call “vertical tolerance.” The motor allows you to tackle gradients that would otherwise spike your heart rate into the anaerobic zone (the red zone). By keeping the assist high on climbs, you can stay in the aerobic zone, which is where endurance is built.
This approach transforms a terrifying climb into a manageable interval workout. Visualizing the route profile helps in planning these energy expenditures.
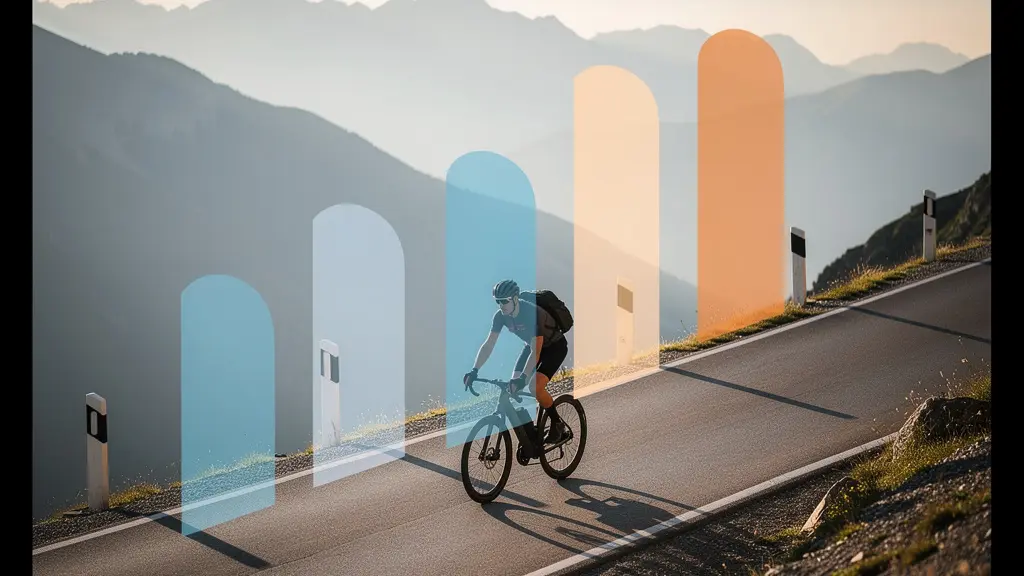
As you can see, the path upward is a steady progression. We apply a concept called “vertical periodization” to safe-guard against burnout.
Weekly vertical periodization protocol
Cycling training plan for beginners is designed for cycling beginners who just started riding. Weekly cycling distances typically range from 50 km to 100 km, distributed over multiple rides depending on the initial fitness level. The protocol increases total weekly elevation gain by 10-15% with specific assist-level rules: Week 1 uses Turbo on all climbs over 4% grade, Week 4 uses Eco on climbs under 5% and Tour on steeper grades, progressing to Week 8 using Eco-only for everything below 8%.
Relying solely on a smartphone for navigation is a common rookie mistake that can leave you stranded.
Why Using Your Phone for GPS Can Leave You Stranded
Using your smartphone as your primary cockpit dashboard is risky for long rides. The combination of high screen brightness (to fight glare), GPS tracking, and Bluetooth connection creates a massive power draw. Furthermore, direct sunlight on the handlebars can overheat the device, causing it to shut down abruptly for thermal protection.
Technical assessments show that running GPS tracking with screen-on navigation can drain the battery 3-4x faster than normal usage. If your phone dies, you lose not just your map, but your emergency communication line. Dedicated GPS head units are designed to last 15+ hours, whereas a phone might struggle to last 3 hours under these conditions.
Navigation Failsafe Checklist: Safety Protocol
- Hardware: Install a dedicated GPS unit (Wahoo/Garmin) with 15+ hour battery life as primary.
- Backup: Keep your phone in airplane mode with pre-downloaded offline maps (Secondary).
- Analog: Carry a laminated paper cue sheet with key turns and emergency numbers (Tertiary).
- Weight check: Verify total added weight is under 200g for complete redundancy.
- Simulation: Test all systems during training rides before relying on them for a 3-hour trip.
Long-term endurance isn’t just about one ride; it’s about the longevity of your equipment.
Charging to 80%: The Secret to Doubling Battery Lifespan
Lithium-ion batteries, the heart of your e-bike, degrade fastest when held at extreme states of charge (0% or 100%). For daily training rides that don’t push the range limit, charging to 100% is actually detrimental. It stresses the chemical structure of the cells. By stopping the charge at 80%, you significantly reduce this stress.
Studies indicate that maintaining charge within this range can nearly double the battery lifespan over several years. This means your battery will maintain its original range capacity for more seasons, protecting your ability to do those 3-hour rides in the future.
| Brand | Charge Limit Feature | How to Access |
|---|---|---|
| Bosch | Yes (80% option) | Via eBike Connect app |
| Shimano STEPS | Limited models | E-Tube Project app |
| Specialized | Yes (Mission Control) | Mission Control app settings |
| Generic batteries | No native option | Use smart-plug timer method |
Packing for a self-supported trip requires a shift in mindset from “just in case” to “absolutely essential.”
Key Takeaways
- Manage both your body’s glycogen and the bike’s battery to avoid “bonking”.
- Hydrate aggressively to counter the “wind chill” evaporation effect.
- Use vertical periodization to turn hills into aerobic training assets.
E-Bike Trekking Essentials: Packing for a 3-Day Self-Supported Trip
Transitioning from a 3-hour ride to a 3-day trip changes everything. Weight management becomes paramount because a heavy bike drains the battery faster, reducing your range and potentially stranding you between charging points. Every item must earn its place in your panniers.
Focus on calorie-dense foods that take up minimal volume. You need fuel that provides sustained energy without adding kilograms of weight. A strategic food list balances weight against caloric density.
Weight-Optimized Nutrition Pack: The Essentials
- Fats: Nut butters (180 kcal per 30g serving) for slow-burning fuel.
- Sugars: Dried fruits (100 kcal per 30g serving) for immediate energy.
- Additives: Olive oil sachets (120 kcal per 15ml packet) to boost meal calories.
- Solids: Energy bars (250-300 kcal per 60g bar) for on-the-bike eating.
- Target: Aim for 2,800-3,500 kcal daily intake while keeping total food weight under 800g.
With the right gear and nutrition, the horizon is your only limit. It is time to rethink what is possible.
Start planning your first 3-hour route today by applying the vertical periodization technique to your local map.