In summary:
- Mastering momentum and coasting in the city can save more energy than aggressive pedaling.
- Your tires are your biggest enemy or ally; their pressure and tread can cost you up to 40% of your range.
- External factors like cold weather drastically reduce battery capacity, but this can be managed with smart storage and riding techniques.
- Using lower assist modes strategically and understanding your battery’s specs are crucial for maximizing every watt-hour.
There’s no feeling quite like it: the long ride home ahead, and the dreaded single bar flashing on your e-bike’s display. It’s a modern form of range anxiety that can turn a pleasant commute into a stressful ordeal. Most guides offer the same generic advice: “pedal harder” or “use a lower assist level.” While true, this advice misses the bigger picture. It treats your e-bike like a simple bicycle, not the sophisticated energy system it truly is.
The real secret to squeezing out those crucial extra miles isn’t just about your legs; it’s about physics, chemistry, and strategy. But what if the key wasn’t simply working harder, but working smarter by understanding and manipulating the hidden forces that drain your battery? What if you could gain significant range by changing how you ride, not just how much power you use? This approach focuses on non-obvious hacks that give you a quantifiable boost when every single mile home counts.
This guide will break down the core principles of e-bike energy management. We’ll explore how to conserve momentum in city traffic, reveal the massive impact of your tires, and explain the science behind battery performance in different conditions. By the end, you won’t just be a rider; you’ll be a savvy energy system operator, fully equipped to get home, even when your battery is screaming “empty.”
To navigate these advanced techniques, we’ve structured this article to build your expertise from fundamental science to practical application. The following sections will guide you through each critical aspect of e-bike efficiency.
Summary: How to Get 10 Extra Miles of Range Without Charging
- Why Cold Weather Drops Your Battery Capacity by 30%
- How to Momentum-Coast to Save Energy in Urban Stop-and-Go
- Smooth Tires vs Knobby Tires: The Impact on Watt Consumption
- The Risk of Under-Inflated Tires Costing You 15% Battery
- Charging to 80%: The Secret to Doubling Battery Lifespan
- How to Extend Your Range by 20% Using Low-Assist Modes
- Why Your Battery Dies Faster in Freezing Temperatures
- Wh vs Ah: How to Read E-Bike Battery Specs Like a Pro
Why Cold Weather Drops Your Battery Capacity by 30%
If you’ve ever noticed your e-bike feeling sluggish and your range plummeting on a cold day, you’re not imagining it. This isn’t a mechanical failure; it’s a fundamental principle of battery chemistry. The lithium-ion cells in your battery rely on a chemical reaction to release energy, and this reaction is highly sensitive to temperature. Think of it as a “thermal penalty” imposed by the cold.
As temperatures drop, the electrolyte fluid inside the battery becomes more viscous, like honey in a refrigerator. This slows down the movement of lithium ions between the anode and cathode, increasing the battery’s internal resistance. Your bike’s motor has to work harder to pull the same amount of power, leading to a significant drop in efficiency and overall available capacity. This effect is not minor; a study confirms that storage and operation below 40°F (4°C) can result in a 30% reduction in a battery’s total capacity.
This means a battery that gives you 40 miles of range in the summer might only provide 28 miles in the winter, even if it’s fully charged. Understanding this principle is the first step in combating winter range loss. It’s not that the energy has vanished; it’s just become much harder for your bike to access it. The solution, therefore, lies in managing the battery’s temperature, a topic we’ll explore in more detail later.
How to Momentum-Coast to Save Energy in Urban Stop-and-Go
Urban commuting is an energy-killer. The constant stopping and starting at traffic lights and intersections forces your motor to perform its most power-hungry task over and over: accelerating from a standstill. Much like a car’s fuel consumption skyrockets in city traffic, your e-bike’s battery is drained by this “stop-and-go” cycle. The secret to fighting this is mastering the art of momentum conservation.
Instead of riding at full speed until you have to brake hard, the goal is to anticipate stops and use your bike’s existing momentum to “coast” as much as possible. This means looking far ahead, reading traffic light patterns, and easing off the throttle or pedals well before you need to stop. Every second you spend rolling without motor assistance is pure energy savings. This “Pulse and Glide” technique—pulsing with power to get up to speed, then gliding without power for as long as possible—is far more efficient than maintaining a constant, powered speed between intersections.
The Stop-and-Go Energy Drain
The more frequently you stop and restart, the more battery power you consume. Each time you begin pedaling again from a stop, the motor engages to overcome inertia, which is its most demanding task. By anticipating stops and coasting slowly toward a red light instead of braking hard at the line, you minimize these high-draw acceleration events and significantly extend your effective range in an urban environment.
Adopting this mindset requires practice but pays huge dividends, especially when your battery is low. It shifts your focus from raw speed to ultimate efficiency, turning your commute into a strategic game of energy management.
Action Plan: Mastering Urban Coasting
- Anticipate Stops: Look 2-3 blocks ahead to identify traffic light patterns and predict when you’ll need to slow down.
- Initiate Early Coasting: Begin to coast without pedaling or throttle at least 10 seconds before you anticipate coming to a full stop.
- Practice Gradual Deceleration: Avoid using your brakes. Instead, let air resistance and rolling resistance slow you down naturally.
- Implement “Pulse and Glide”: Apply power in short bursts to reach a cruising speed, then switch off the motor or stop pedaling to glide between intersections.
- Leverage Terrain: Switch the motor off completely on even slight downhills and let gravity do the work for you.
Smooth Tires vs Knobby Tires: The Impact on Watt Consumption
One of the most overlooked factors in e-bike range is rolling resistance. This is the force your motor must overcome just to keep the tires moving along a surface. The single biggest contributor to this force is your tire choice. The difference between a smooth road tire and a knobby mountain bike tire isn’t just aesthetic; it’s a massive energy equation that can dictate whether you make it home or not.
Knobby tires are designed for grip on loose surfaces like dirt and mud. On paved roads, those knobs deform and squirm with every rotation, creating significant friction and drag. This wastes a tremendous amount of energy that could have been used for forward motion. Smooth or “slick” tires, on the other hand, have a much smaller, more uniform contact patch, minimizing friction and allowing the wheel to roll with far less effort. The difference in watt-hours consumed per mile can be staggering.
The illustration below highlights the dramatic difference in how these two tire types interact with the pavement at a microscopic level, creating a vast “rolling resistance delta.”

As you can see, the smooth tire presents a clean, efficient surface, while the knobby tire creates chaotic friction. For a commuter who spends most of their time on pavement, choosing the right tire is not a minor optimization—it’s one of the most impactful decisions for maximizing range.
This table breaks down the real-world energy cost associated with different tire types, showing a clear penalty for using aggressive tread on paved surfaces.
| Tire Type | Wh/Mile Consumption | Typical Range Impact | Best Surface |
|---|---|---|---|
| Road/Slick | 7-10 Wh/mi | Baseline | Paved roads |
| Semi-Slick | 10-15 Wh/mi | -10% to -20% | Mixed terrain |
| Knobby/Mountain | 15-25 Wh/mi | -30% to -40% | Off-road trails |
The Risk of Under-Inflated Tires Costing You 15% Battery
Even with the perfect slick tires, you could be throwing away a significant portion of your battery life with one simple mistake: improper inflation. Under-inflated tires are the silent killer of e-bike range. When a tire is soft, its contact patch with the road increases, and the sidewalls flex excessively with every rotation. This deformation creates a huge amount of rolling resistance, forcing your motor to work much harder just to maintain speed.
Think of it like trying to run on soft sand versus a paved track. The extra effort your legs have to put in is exactly what your e-bike’s motor experiences. The energy loss is not trivial; studies show that under-inflated tires can reduce your e-bike’s efficiency by up to 15%. For a 40-mile range, that’s a loss of 6 miles, simply because of low air pressure. This is “free” range you are giving up for no reason.
The Denago E-Bikes Technical Team emphasizes this point clearly in their guide on extending e-bike range:
Just as with an automobile, under-inflated tires create additional rolling resistance that makes your eBike less efficient. Keeping the proper tire pressure is a free and easy way to increase the range of your electric bike.
– Denago E-Bikes Technical Team, How to Extend the Range of Your eBike
Checking your tire pressure is one of the highest-impact, lowest-effort actions you can take. Every tire has a recommended PSI (pounds per square inch) range printed on its sidewall. Using a floor pump with a gauge to keep your tires inflated to the upper end of this range is essential for any rider serious about efficiency.
Charging to 80%: The Secret to Doubling Battery Lifespan
This next tip might seem counter-intuitive, especially when you’re focused on maximizing every mile. Common wisdom says to charge your battery to 100% before every ride. However, for the long-term health and capacity of your battery, this is often the wrong approach. Constantly charging a lithium-ion battery to its absolute maximum and draining it to its minimum puts significant strain on the battery cells.
Charging to 100% holds the cells at a high voltage, which accelerates the degradation of the cathode material. Similarly, deep discharges below 20% can cause irreversible damage. The “sweet spot” for daily use and long-term health is to keep the battery’s state of charge between 20% and 80%. This simple habit can dramatically extend the number of effective charge cycles your battery can handle before its capacity starts to noticeably decline.
While you should absolutely charge to 100% when you know you need maximum range for a specific long trip, adopting the 80% rule for your daily commute is a powerful long-term strategy. It ensures that your battery retains its maximum potential capacity for years to come. The visualization below shows this optimal charging zone.
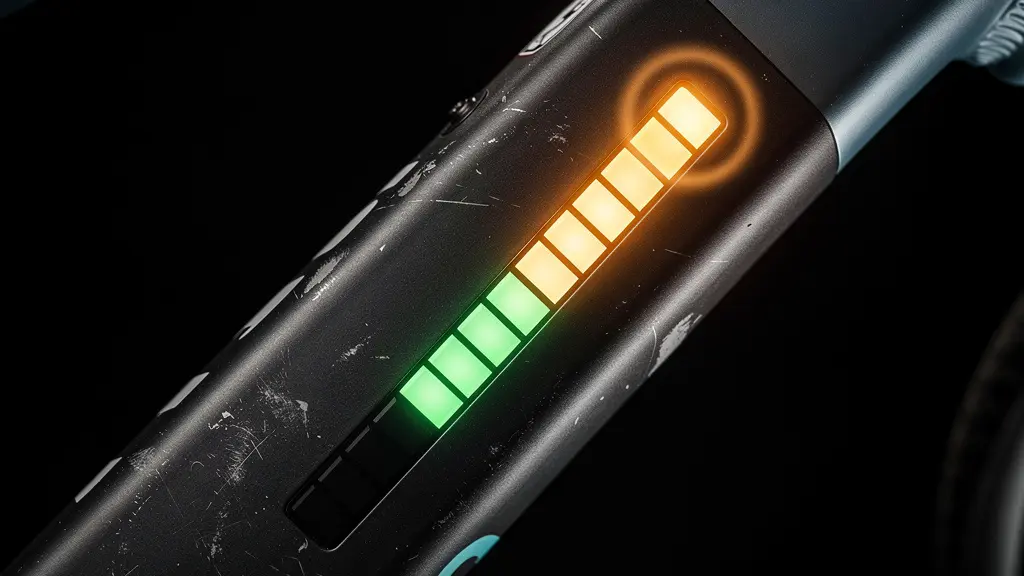
This strategy is about future-proofing your range. A healthy battery is a battery that can deliver its full advertised range. By reducing strain, you are effectively ensuring you don’t suffer from premature capacity loss, which is the ultimate range killer.
Smart Charging for Longevity
To prolong your battery’s lifespan, avoid the extremes. Keeping the charge level between 20% and 80% for routine rides minimizes stress on the cells. This practice helps maintain optimal performance and can significantly prolong the battery’s overall life, ensuring it delivers its intended range for more charge cycles.
How to Extend Your Range by 20% Using Low-Assist Modes
This is perhaps the most direct and impactful way to manage your energy consumption on the fly. Your e-bike’s pedal-assist system (PAS) allows you to choose how much help you get from the motor. While it’s tempting to leave it in “Turbo” or “Sport” mode for an effortless ride, these high-assist levels drain your battery at an astonishing rate. Learning to live in the lower-assist “Eco” or “Tour” modes is fundamental to range extension.
Using a lower assist level forces you to contribute more human power, but the energy savings are disproportionately large. The motor’s consumption doesn’t scale linearly; it often jumps significantly with each level. By staying in the lowest setting possible for your terrain and fitness level, you can dramatically extend your range. Test results confirm this, showing that riders using Eco mode 70% of the time can gain up to 22% more range compared to those who primarily use higher settings.
To make this practical, adopt a “Bio-Pacing” technique. Instead of letting the motor do all the work, aim to maintain a steady pedaling cadence (around 70-75 RPM is often most efficient) and use the assist only to help you maintain that cadence, not to replace your effort. Use higher assist levels strategically for tough hills or accelerating from a stop, then immediately shift back down to Eco mode once you’re moving. Also, remember to turn off accessories like integrated lights if you’re in a critical low-battery situation, as they also draw power.
Why Your Battery Dies Faster in Freezing Temperatures
We’ve established that cold weather reduces a battery’s effective capacity. But the problem is twofold: the cold not only limits the available energy but also makes the entire system less efficient, causing the battery to drain faster during a ride. This section focuses on the practical consequences and mitigation strategies for riding in the cold.
When you start riding with a cold battery, its high internal resistance means that for every watt of power delivered to the motor, more energy is wasted as heat inside the battery itself. The battery is fighting against itself. This is why a bike can feel particularly sluggish for the first few miles of a winter ride. The battery needs to warm up to an optimal operating temperature to become efficient.
The engineering team at FIT E-Bike highlights the importance of this operating window:
A temperature of between 10 and 20 degrees C is usually ideal for an e-bike battery. Conversely, this means that the battery suffers more in colder weather. This is usually no more than a few percent, but you should bear this in mind when planning the range of your tour.
– FIT E-Bike Engineering Team, Extending the e-bike battery range: ten tips
The key takeaway is to manage your battery’s temperature. You can’t change the weather, but you can change how your battery experiences it. Implementing a simple winter protocol can make a huge difference in preserving those precious miles on a cold commute.
- Store Indoors: Always store your battery at room temperature overnight. Never leave it on the bike in a cold garage.
- Insulate It: Use a neoprene battery cover during your ride. This acts like a wetsuit, trapping the heat the battery generates and keeping it in its optimal temperature range for longer.
- Warm It Up Gently: Start your ride in a low-assist mode for the first 10 minutes. This allows the battery to warm up gradually, reducing internal resistance before you demand high power.
- Never Charge a Frozen Battery: If your battery has been left in the cold, always let it return to room temperature for a few hours before plugging it in. Charging a frozen cell can cause permanent damage.
Key takeaways
- Mastering momentum through smart coasting in urban areas provides a massive, “free” energy saving that costs nothing but attention.
- Your tire pressure and tread type are not minor details; they can account for a range difference of over 30% and are the easiest factors to optimize.
- Cold weather is a chemical enemy to your battery, but its effects can be significantly mitigated by storing the battery indoors and insulating it during rides.
Wh vs Ah: How to Read E-Bike Battery Specs Like a Pro
Finally, to truly become an expert in energy management, you need to understand the language of your battery. When you look at battery specifications, you’ll see a string of numbers and acronyms like “36V,” “14Ah,” and “504Wh.” These aren’t just marketing terms; they are the fundamental DNA of your e-bike’s range and power. Understanding them allows you to predict performance and make informed decisions.
The most important number for range is Watt-hours (Wh). This figure represents the total amount of energy stored in your battery—it’s the size of your “gas tank.” It’s calculated by multiplying the battery’s Voltage (V) by its Amp-hours (Ah). Voltage (V) is like the electrical “pressure” that determines how forcefully the power is delivered, impacting hill-climbing ability. Amp-hours (Ah) measure the battery’s capacity to sustain a current over time. But it’s the combined Watt-hour figure that gives you the best direct indicator of potential range.
For example, a rider’s efficiency might be around 20 Wh per mile. With a 504Wh battery, you can calculate a theoretical range: 504Wh / 20 Wh/mi = ~25.2 miles. This simple math allows you to cut through the marketing claims and get a realistic estimate of how far you can go.
This table provides a simple breakdown of what these key battery specifications mean in the real world.
| Specification | What It Means | Real-World Impact |
|---|---|---|
| Watt-hours (Wh) | Total energy capacity (V × Ah) | Direct indicator of range potential |
| Voltage (V) | Electrical ‘pressure’ | Higher voltage = better hill climbing |
| Amp-hours (Ah) | Current flow capacity | How long battery can deliver power |
| Example: 36V 12Ah | 432 Wh total | ~22-29 miles range typical |
Being able to read these specs empowers you. It helps you understand why two bikes with the same size motor might have vastly different ranges, and it gives you the tools to calculate your own energy needs before you even start a ride. It’s the final piece of the puzzle in becoming a true master of your e-bike’s energy system.
Now that you’re armed with these strategies, you can transform range anxiety into range confidence. The next logical step is to apply these principles and analyze how they fit your specific bike and riding style to create a personalized efficiency plan.