
Improving fitness on an e-bike isn’t about chasing higher speed or motor power; it’s about mastering the ratio between your personal effort and the bike’s assistance.
- Your body’s output (rider watts and heart rate) is the true source of fitness gains, not the motor’s power.
- Use specific metrics for specific goals: Normalized Power for consistent effort, and Heart Rate as a “ceiling” to ensure every ride has a clear purpose.
Recommendation: Stop treating your display like a scoreboard. Start using it as a diagnostic tool to manage your effort-to-assist balance for targeted training outcomes.
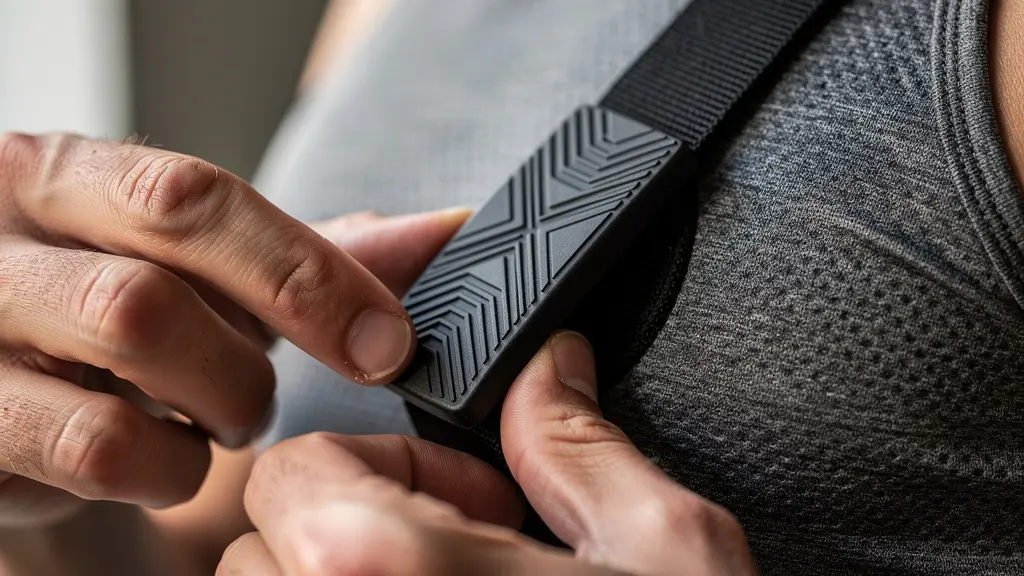
Your e-bike’s display is a treasure trove of data: watts, speed, heart rate, cadence. For many recreational riders, these numbers can feel overwhelming or, worse, like a video game score to maximize. The common approach is to see bigger numbers as better—more motor watts, higher average speed. This leads to the misconception that the bike is doing all the work, undermining your fitness goals.
The truth is, these metrics are not just for show. They are the language your body and bike use to communicate. Learning to interpret this language is the difference between simply going for a ride and executing a structured, effective workout. The real key to unlocking your fitness potential isn’t in what the motor is doing, but in understanding and controlling what your body is contributing. It’s about the synergy between human effort and electric assistance.
This guide will shift your perspective. We will move beyond the surface-level numbers and delve into the relationships between them. You’ll learn why your personal power output is the cornerstone of your health, how to use heart rate to control intensity, and why a metric like Normalized Power is far more valuable than average speed for measuring true effort. We’ll transform your e-bike from a simple mode of transport into a sophisticated training partner.
To navigate this wealth of information, this article breaks down the essential telemetry you need to understand. Follow this guide to turn your raw data into real-world fitness gains.
Summary: Your Guide to E-Bike Data Interpretation
- Why Rider Wattage Matters More Than Motor Wattage for Health
- How to Pair Your Heart Rate Monitor with the Bike Display
- Average Speed vs Normalized Power: What to Track for Commuting?
- The Danger of Staring at Screens Instead of the Road
- Using Mileage Logs to Schedule Chain Replacements
- Heart Rate vs Power: Which Metric Dictates Your Effort?
- How to Estimate Range Based on Elevation Gain and Weight
- Using E-Bike Metrics to Manage Recovery Rides for Cyclists
Why Rider Wattage Matters More Than Motor Wattage for Health
The most common mistake e-bike riders make is focusing on the motor’s power. While a powerful motor can flatten hills, it contributes nothing to your cardiovascular health. Fitness gains are a direct result of the work your own body performs. This work is measured in rider wattage—the physical power you are personally applying to the pedals. This is the single most important metric for improving your health.
Think of the motor’s assistance not as a replacement for your effort, but as a tool to control the environment. It allows you to extend the duration of your workouts or stay within a specific effort zone without being overwhelmed by steep terrain. For example, by using a low level of assist, you can maintain a steady 120-watt output for an hour, building your aerobic base, whereas on a non-electric bike, hills might force you into unsustainable, high-wattage anaerobic efforts.
The goal is to understand and improve your personal power-to-assist ratio. As you get fitter, you should be able to produce the same rider wattage with less assistance, or maintain a higher wattage on the same route. This is tangible progress. Each wattage level corresponds to a specific physiological training zone, each with its own benefit.
Understanding these zones is the first step to turning your rides into purposeful training sessions. This table breaks down what your body achieves at different power outputs.
| Power Zone | Watts Range | Training Benefit | Duration Sustainable |
|---|---|---|---|
| Recovery | 50-75W | Active recovery, promotes blood flow | 2+ hours |
| Endurance | 75-125W | Aerobic base building | 1-2 hours |
| Tempo | 125-175W | Aerobic threshold improvement | 20-60 minutes |
| Threshold | 175-250W | Lactate threshold development | 8-20 minutes |
| VO2 Max | 250W+ | Maximum aerobic power | 3-8 minutes |
Ultimately, the motor gets you there, but your effort makes you healthier. Shifting your focus from the bike’s output to your own is the fundamental mindset change required for effective e-bike training.
How to Pair Your Heart Rate Monitor with the Bike Display
While rider wattage measures your mechanical output, your heart rate (HR) measures your body’s physiological response to that effort. The two are intrinsically linked, and having both metrics is crucial for a complete picture of your workout. Pairing a heart rate monitor—typically a chest strap for best accuracy—with your e-bike’s display is a non-negotiable step for serious training.
Most modern e-bike systems (like those from Bosch, Shimano, or Brose) can connect to ANT+ or Bluetooth heart rate monitors. The process is usually simple: activate the monitor, navigate to the settings menu on your bike’s display, and search for new sensors. Once paired, your live heart rate will appear on your screen, allowing you to train within specific HR zones, such as Zone 2 for fat burning and endurance, or Zone 4 for threshold improvement.
The real magic of combining HR data with an e-bike is the ability to precisely control intensity. If your heart rate drifts too high on a climb, you can increase the motor’s assistance to bring it back down into your target zone. This prevents overexertion and allows you to extend the productive time of your workout, a key factor demonstrated in recent studies.
Case Study: E-Bike Assist for Cardiovascular Improvement
In a 4-week study, researchers at Colorado University equipped previously inactive participants with e-bikes and heart rate monitors. By riding for a minimum of 40 minutes, three days per week, they were instructed to use the pedal assist to keep their effort within Zone 2 (60-70% of max HR). The assistance allowed them to sustain this effort for far longer than they could on conventional bikes. The results were significant: participants showed improved cardiovascular fitness, better blood sugar regulation, and a reduction in body fat, proving that using e-assist to manage HR is a powerful fitness strategy.
This connection empowers you to train smarter, not just harder, ensuring every pedal stroke contributes to a specific physiological adaptation and moves you closer to your fitness goals.
Average Speed vs Normalized Power: What to Track for Commuting?
When tracking progress, especially on a commute with varied terrain, traffic, and stops, average speed is a deeply flawed metric. A strong tailwind or a long downhill can inflate your average speed without you putting in any real effort. Conversely, a hilly route will drag your average speed down, even if your workout was incredibly intense. For a true measure of your physiological effort, you need to look at Normalized Power (NP).
Normalized Power is an advanced metric that provides a more accurate estimate of the true intensity of your ride. It smooths out power spikes and drops (like coasting downhill or sprinting away from a light) to calculate a power number that is equivalent to what you could have sustained steadily for the same duration. In short, NP tells you how hard the ride *felt* to your body, making it a far superior metric for tracking fitness over time. Many cycling computers and apps like Strava can calculate NP if you have a power meter source (which many e-bikes provide for rider wattage).
For a commuter, aiming to improve NP on the same route is a much better goal than trying to increase average speed. It encourages consistent, smooth effort rather than risky, inefficient sprints. It also helps you manage your energy. For instance, data shows that typical e-bike commuters consume approximately 15 Wh/mile. By analyzing your NP, you can identify “power sinks”—segments like steep, short hills where your power spikes inefficiently—and use a touch more assist to smooth out your effort, preserving energy for the rest of your ride.
By shifting your focus from the vanity metric of average speed to the actionable insight of Normalized Power, you can turn your daily commute into a consistent and measurable training session.
The Danger of Staring at Screens Instead of the Road
Having a wealth of data at your fingertips is fantastic, but it introduces a significant risk: distraction. Constantly looking down at your bike’s display to check your power, heart rate, or cadence takes your eyes and your focus off the road. This is especially dangerous in urban environments or on technical trails where a split-second of inattention can lead to an accident. The goal of data-driven training is to enhance your ride, not to endanger it.
A much safer and more effective approach is to configure your devices to give you feedback without requiring visual attention. Modern cycling computers and smartwatches can provide audio or haptic alerts when you enter or exit a pre-set training zone. For example, you can set an alert to beep or vibrate if your heart rate exceeds the top of your Zone 2, or if your cadence drops below your target of 80 RPM. This allows you to keep your eyes on the road and only make adjustments when prompted by a signal.
This method has been proven to be not only safer but also more effective for training. A trial conducted by a professional cycling coach demonstrated this clearly. Riders using audio alerts stayed in their target zones more consistently than those relying on visual checks, all while dramatically improving safety.
Your 5-Point Checklist for Safe Data Monitoring
- Set and Forget: Configure your ride to auto-record on an app like Strava or Garmin Connect before you start, so you don’t have to fiddle with it mid-ride.
- Leverage Audio Alerts: Set up beeps for crossing key thresholds, such as one beep when you enter Heart Rate Zone 3 and two beeps for Zone 4.
- Use Haptic Feedback: Utilize your smartwatch’s vibration feature for cadence targets, providing a silent, physical cue to adjust your pedaling speed.
- Simplify Your Display: Customize your screen to show only one primary metric (e.g., heart rate) in a large, easily glanceable font. Hide the rest.
- Schedule Data Dives: Plan to pull over for a complete stop every 20-30 minutes for a detailed review of all your metrics. Do not analyze data while moving.
This allows you to remain fully engaged with your training goals while maintaining absolute focus on the path ahead, ensuring your pursuit of fitness doesn’t compromise your safety.
Using Mileage Logs to Schedule Chain Replacements
An e-bike’s motor significantly increases the power running through your drivetrain. This means components like the chain and cassette wear out much faster than on a non-electric bike. Ignoring this fact leads to poor shifting, costly repairs, and potential safety failures. Using your e-bike’s data to proactively manage maintenance is not just smart; it’s essential for the longevity and reliability of your bike.
Instead of relying on guesswork, you can use your ride data to establish a precise maintenance schedule. Many e-bike systems track total mileage (odometer) and some even track total energy output. This data is invaluable for predicting component wear. For example, drivetrain experts recommend checking your chain for stretch or wear based on total energy consumption, with some suggesting an inspection every 50 kWh of total output. This is a far more accurate method than just using distance, as it directly accounts for the total force applied to the chain.

The level of assistance you use has a direct and dramatic impact on how quickly your chain wears. Riding consistently in Turbo mode can wear out a chain three times faster than riding in Eco mode. A chain wear tool is an inexpensive and easy-to-use gadget that tells you when your chain is “stretched” and needs replacement. Replacing a worn chain (a relatively cheap part) on time prevents it from wearing down your much more expensive cassette and chainrings.
This table illustrates how your choice of assist mode directly impacts your maintenance schedule. Use it to create a proactive plan based on your riding style.
| Assist Mode | Typical Total Power | Chain Wear Rate | Check Interval |
|---|---|---|---|
| Eco (25%) | 150W total | Baseline (1x) | Every 2000km |
| Tour (50%) | 250W total | 1.5x baseline | Every 1300km |
| Sport (75%) | 400W total | 2x baseline | Every 1000km |
| Turbo (100%) | 600W total | 3x baseline | Every 650km |
This data-driven approach not only saves you money in the long run but also ensures your bike is always safe, reliable, and performing at its best when you need it.
Heart Rate vs Power: Which Metric Dictates Your Effort?
This is the classic debate among data-driven cyclists: should you train by power (watts) or by heart rate (HR)? The answer, especially for an e-bike rider, is not one or the other. It’s about using the right metric for the right situation. Power measures your immediate mechanical output, while heart rate measures your body’s delayed physiological response. Understanding when to trust each metric is the key to executing flawless workouts.
Power is king for short, intense efforts. For intervals under two minutes, your heart rate lags significantly behind your effort. You could complete a 30-second sprint before your HR even has time to climb into a high zone. In these scenarios, targeting a specific power output (e.g., 300 watts) is the only way to ensure the correct intensity. Power is the cause; HR is the effect.
Heart rate is the governor for long, steady efforts. During long endurance rides, your HR is a better indicator of your overall physiological strain. A phenomenon known as “cardiac drift” can occur, where your heart rate slowly rises even if your power output remains constant, due to factors like dehydration or fatigue. On an e-bike, you can respond to this by slightly increasing assist to lower your power output and keep your HR in the target endurance zone. HR also reflects external stresses like heat or altitude that power numbers alone can’t show.
The most effective training combines both. You might use a power target to set the pace on a climb, but use your heart rate as a “ceiling” you refuse to exceed to prevent overexertion. This decision matrix clarifies when to prioritize each metric.
| Scenario | Primary Metric | Secondary Metric | Reasoning |
|---|---|---|---|
| Short intervals (<2 min) | Power | Heart Rate | HR lags behind effort |
| Long endurance rides | Heart Rate | Power | HR accounts for fatigue |
| Hill climbs | Power (target) | HR (ceiling) | Power sets pace, HR prevents overexertion |
| Recovery rides | Heart Rate | Power | HR ensures true recovery |
| Temperature extremes | Heart Rate | Power | HR reflects thermal stress |
By using them in synergy, you can dose your effort with surgical precision, ensuring that every workout is as effective as possible and perfectly aligned with your physiological goals.
How to Estimate Range Based on Elevation Gain and Weight
Range anxiety is a real concern for e-bike riders. The manufacturer’s advertised range is often an optimistic best-case scenario that doesn’t account for the biggest variables: your weight, your cargo, and the hills you climb. However, you can use your own ride data to build a remarkably accurate personal range prediction model. The key is to track your energy consumption, measured in Watt-hours per kilometer (Wh/km) or per mile (Wh/mi).
Your bike’s display will show your battery capacity in Watt-hours (Wh), for example, 500Wh. By tracking how many Wh you use per kilometer on different types of terrain, you can predict your range with confidence. Start by recording your Wh/km on several flat rides, then on rides with rolling hills, and finally on steep, mountainous rides. You will quickly see a pattern emerge. This data allows you to create personal “terrain multipliers” to adjust your base consumption rate.
Total weight (you + bike + gear) is the other critical factor. More weight requires more energy to move, especially uphill. The impact of weight is not linear; its effect is magnified on steeper gradients. As the table below shows, a heavier rider’s energy consumption increases more dramatically as the terrain gets steeper, which in turn significantly reduces their total range.
This table gives a general idea of how terrain and rider weight impact energy consumption. Your personal data will be even more accurate.
| Terrain Type | Typical Wh/km | 80kg Rider | 100kg Rider | Range Impact |
|---|---|---|---|---|
| Flat Urban | 8-10 | 8 Wh/km | 10 Wh/km | Baseline |
| Rolling Hills | 12-15 | 12 Wh/km | 15 Wh/km | -40% range |
| Mountain (5% avg) | 18-22 | 18 Wh/km | 22 Wh/km | -60% range |
| Steep Mountain (8%+) | 25-30 | 25 Wh/km | 30 Wh/km | -70% range |
This data-driven approach replaces anxiety with confidence, allowing you to plan ambitious rides knowing exactly how far your battery will take you.
Key Takeaways
- Fitness comes from your effort (rider watts), not the motor’s. Use assist to control workout duration and intensity.
- Heart rate measures your body’s response. Use it as a governor for long rides and a ceiling for climbs to prevent overexertion.
- Forget average speed. Normalized Power (NP) is the best metric for tracking true effort and improving consistency over time.
Using E-Bike Metrics to Manage Recovery Rides for Cyclists
One of the most powerful—and most misunderstood—applications of an e-bike for a fit cyclist is the recovery ride. A true recovery ride is meant to be extremely low intensity, promoting blood flow and flushing metabolic waste without adding training stress. The problem is that on a regular bike, even small hills can force your effort level out of the recovery zone and into a workout zone, defeating the purpose. This is where e-bike metrics become an invaluable tool for ensuring recovery is truly recovery.
For a properly executed recovery session, your effort must remain strictly within Heart Rate Zone 1 or, if using power, below a certain threshold. For trained athletes, true recovery rides require maintaining power output below 55% of FTP (Functional Threshold Power). On an e-bike, you can enforce this with discipline. By setting a strict HR ceiling (e.g., 120 bpm), you can use the motor assist—from Eco to Turbo if necessary—to keep you below that ceiling no matter how steep the terrain gets. This guarantees a true recovery session.
This isn’t just theory; it’s a proven strategy used by elite athletes to enhance their performance. By using e-bikes to protect their recovery days, they can hit their subsequent high-intensity sessions harder and with better results.
Case Study: The E-Bike Recovery Protocol
In a study of elite cyclists, one group performed their recovery rides on e-bikes using a strict “HR Ceiling” method, always staying in Zone 1. The control group did their recovery on regular bikes. Over a 12-week training block, the athletes using e-bikes showed 15% better performance in their key high-intensity interval sessions. This was attributed to the fact they were able to achieve genuine recovery, while the other group was accumulating unintended fatigue on hills during their “easy” rides.
By leveraging your e-bike’s telemetry to enforce recovery, you can ensure your body is perfectly primed for its next hard effort, leading to faster, more consistent fitness gains.