
Every workshop manager sees the same story. An e-bike owner comes in with a “small issue”—a skipping chain or a grinding noise—and leaves with a repair bill that makes their eyes water. That sinking feeling is all too common for those who adopt the “if it ain’t broke, don’t fix it” philosophy. They treat maintenance as an optional chore, a cost to be avoided. From where I stand, surrounded by bikes in various states of disrepair, that’s the single most expensive mistake you can make.
The common advice is to “clean your bike” or “check your tires,” but that barely scratches the surface. The real issue is a fundamental misunderstanding of how an e-bike works as a system. The added weight and motor torque put immense stress on components that are considered “consumable.” Ignoring them doesn’t save money; it just defers the cost and multiplies it. A worn-out $40 chain doesn’t just stop working; it takes the $350 cassette and derailleur with it on its way out.
This article reframes e-bike maintenance. We’re throwing out the idea of it being a chore and repositioning it as what it truly is: your single best financial strategy for bike ownership. We’re not going to just tell you what to do. We’re going to show you how to think like a workshop manager—to see the return on investment (ROI) in a bottle of lube and the asset protection in a simple tool. This is about managing your e-bike as a valuable asset to save you real money, season after season.
Here, we will break down the key areas where a small investment of time and money pays huge dividends, transforming your maintenance routine from a cost center into a savings plan.
Summary: The $500 Savings: A Workshop Manager’s Guide to Proactive E-Bike Care
- Why Chains Wear Out Faster on E-Bikes (And How to Check)
- Wet Lube vs Dry Lube: Choosing Based on Your Climate
- Basic Multi-Tool vs Torque Wrench: What Do You Really Need?
- The Risk of Seized Seatposts in All-Weather Commuting
- Washing Your E-Bike: How Often is Too Often for Electronics?
- Consumables to Stock: What to Buy Before It Goes Out of Stock
- Brake Pads and Chains: Why E-Bikes Eat Them 2x Faster
- Service Intervals: Why E-Bikes Need More Frequent Shop Visits
Why Chains Wear Out Faster on E-Bikes (And How to Check)
The single most important component to monitor from a financial perspective is your chain. On an e-bike, the combination of rider power and motor torque puts immense strain on the drivetrain. While a chain on a regular bike might last for thousands of miles, e-bike chains wear significantly faster. It’s not a matter of quality; it’s a matter of physics. The chain is the primary point of failure and, more importantly, your first line of financial defense.
Think of your chain as a $40 financial fuse. Its job is to wear out. When it stretches beyond a certain point, the spacing between the rollers no longer matches the teeth on your much more expensive cassette and chainrings. A stretched chain will rapidly wear down these components, turning a $40 replacement into a $350+ drivetrain overhaul. The difference between a savvy owner and one with a huge repair bill is simply knowing when to replace that fuse.
Checking for chain wear is not a visual inspection; it requires a specific tool. A chain checker tool costs less than $20 and is the single best investment you can make. It gives you a simple pass/fail reading. For modern e-bike drivetrains, you should replace the chain when it reaches 0.5% wear, not the older 0.75% standard. Catching it early is the entire secret to saving money.
Your Action Plan: Chain Wear Management
- Check chain wear every 500 miles using a chain checker tool. It’s a 10-second job.
- Replace the chain proactively at 0.5% wear to protect your expensive cassette and chainrings.
- Calculate your cost-per-mile by dividing the chain price by the miles ridden to understand the true running cost.
- Keep a simple maintenance log (a note on your phone is fine) to track how long components are lasting.
- Embrace the ‘financial fuse’ principle: a cheap, planned replacement prevents an expensive, catastrophic failure.
Wet Lube vs Dry Lube: Choosing Based on Your Climate
If the chain is your financial fuse, then lubricant is the liquid asset that extends its life. Running a dry or dirty chain is like running an engine with no oil; it dramatically accelerates wear and tear. However, not all lubricants are created equal, and choosing the wrong one for your environment can be almost as bad as using none at all. The choice isn’t just about performance; it’s an economic decision based on your riding conditions.
Wet lube is an oil-based, heavier lubricant that is highly resistant to being washed off by rain and puddles. It’s the go-to choice for riders in wet, muddy climates. The downside? Its sticky nature attracts dirt and grime, forming an abrasive paste that can grind down your drivetrain if not cleaned regularly. Dry lube, conversely, is a wax- or Teflon-based lubricant that goes on wet and dries to a clean, non-sticky film. It’s perfect for dry, dusty conditions as it doesn’t attract grit. Its weakness is that it’s easily washed off by a single rain shower.
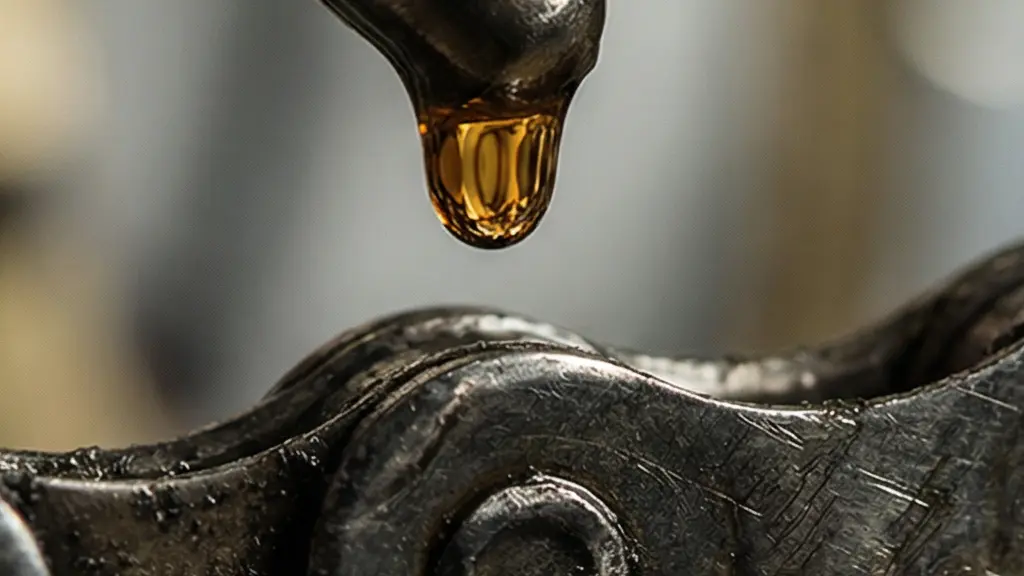
The financial calculation is simple: using a wet lube in a dry climate creates a sandpaper-like paste, accelerating wear. Using a dry lube in a wet climate means your chain is often unprotected, also accelerating wear. The key is to match the lube to your climate and, crucially, to clean the chain before re-applying. A clean, properly lubricated chain runs smoother, quieter, and most importantly, lasts longer, extending the life of your entire drivetrain.
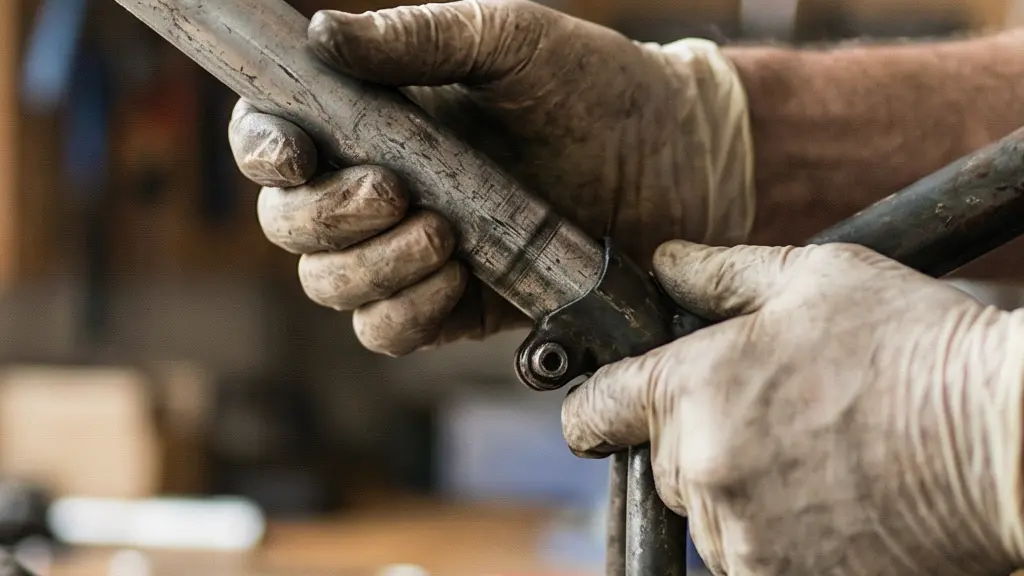
Basic Multi-Tool vs Torque Wrench: What Do You Really Need?
A budget-conscious owner often asks what tools are truly necessary. The answer lies in risk management. A basic multi-tool is essential for roadside adjustments—tightening a loose bolt or adjusting your saddle height. It’s your “get me home” kit. But for home maintenance, especially on a modern e-bike with lightweight or carbon components, the most economically important tool is a torque wrench.
Why? Because manufacturers specify precise torque settings for critical bolts, like those on your stem, handlebars, and seatpost. Too loose, and things can slip, leading to a crash. Too tight, and you can crush or crack expensive components. This is especially true for carbon fiber parts. Overtightening a stem bolt can easily crack a $400 carbon handlebar. As workshop experts will tell you, a $70 torque wrench prevents damage to $400+ carbon components. That’s an ROI of over 400% on its very first use.
Think of your tool kit in tiers. Tier 1 ($20-30) is the multi-tool for emergencies. It’s a reactive tool. Tier 2 ($70-100) is the torque wrench. It’s a proactive, asset-protection tool. It ensures you’re not just tightening a bolt, but you’re doing so within the safe engineering tolerances of the part. Many manufacturer warranties can even be voided if a failure is traced back to improper torque. The torque wrench isn’t a luxury; it’s insurance for the most expensive parts of your bike.
The Risk of Seized Seatposts in All-Weather Commuting
For those who ride their e-bike year-round, water is the enemy. It gets into every nook and cranny, and one of the most common—and expensive—victims is the seatpost. When water gets between the seatpost and the frame, it causes galvanic corrosion, effectively welding the two parts together. We call this a seized seatpost, and it can be a death sentence for your frame.
In the workshop, we see this all the time, especially on bikes used for all-weather commuting. The owner wants to adjust their saddle height or sell the bike, only to find the seatpost is completely immovable. The removal process often involves caustic chemicals, destructive cutting, and a lot of labor, with no guarantee of success. In a recent case, a customer with a high-end e-bike had a permanently fused component. Trying to force it risked cracking the expensive frame, effectively turning a valuable bike into scrap. All this could have been prevented with a $5 investment in grease and ten minutes of work once a year.
The preventive measure is incredibly simple. Once a year, remove your seatpost, clean it and the inside of the frame’s seat tube, apply a fresh coat of anti-seize compound or grease (carbon paste for carbon frames), and re-insert it, using your torque wrench to tighten the bolt to the correct specification. This simple annual ritual is the difference between a functional, adjustable bike and a very expensive paperweight.
Washing Your E-Bike: How Often is Too Often for Electronics?
While keeping your bike clean is important, especially for the drivetrain, how you wash an e-bike is critical. The electrical components—motor, battery contacts, display, and controller—are water-resistant, but not waterproof. Aggressive washing, especially with a pressure washer, can force water past seals and into sensitive electronics, leading to catastrophic failure.
The financial stakes are high. While a mechanical issue might cost you a couple of hundred dollars, water damage to electronics is in another league entirely. As professional mechanics warn that water damage can easily lead to $600+ for motor controller or battery management system repairs. This is an entirely avoidable expense caused by improper cleaning techniques. The mantra for washing an e-bike should be “gently and with purpose.”
A safe washing protocol avoids all high-pressure water. Never aim a hose or, even worse, a pressure washer directly at the motor, battery housing, charging ports, or where cables enter the frame. These are your “no-go zones.” Instead, use a low-pressure water source (like a garden hose on a gentle setting or a pump sprayer) and a bucket of bike-specific soap. Use soft brushes for the frame and more specific brushes for the drivetrain. After washing, dry the bike thoroughly, especially the electrical contact points. For bonus points, apply a small amount of dielectric grease to electrical connections to provide an extra barrier against moisture.
Consumables to Stock: What to Buy Before It Goes Out of Stock
A smart financial strategy involves not just maintenance, but predictive purchasing. E-bike components that are designed to wear out are called consumables. These include chains, brake pads, cassettes, and tires. Waiting for them to fail completely often means your bike is out of commission while you wait for parts, and you’re forced to pay full price. A more economical approach is to manage a small inventory of these key items, bought during off-season sales.
Data from manufacturers provides a clear financial baseline. For instance, one analysis sets the average annual maintenance costs for a cargo e-bike at $295, or about $0.12 per mile, covering these exact consumables. By tracking your own mileage and wear rates, you can anticipate your needs. If you know you replace your chain every 1,000 miles and you ride 3,000 miles a year, you know you’ll need three chains. Buying them during a winter sale can easily save you 20-30% compared to buying them one at a time in peak season.
Your essential stockpile doesn’t need to be huge. The goal is to have the next replacement on hand to avoid downtime and overpaying. Here’s a smart inventory:
- Chains: Have at least one spare on hand.
- Brake Pads: Keep one spare set for front and rear.
- Derailleur Hanger: This small, soft metal piece is designed to bend or break to protect your frame. A bent hanger can end a ride, but a $20 spare in your toolkit saves the day.
- Tubeless Sealant/Valves: If you run tubeless, having a small bottle of sealant and a spare valve core is cheap insurance.
This small inventory, likely costing less than $100, is your buffer against supply chain issues, price hikes, and inconvenient downtime. It’s proactive asset management.
Brake Pads and Chains: Why E-Bikes Eat Them 2x Faster
We’ve established that e-bikes are hard on parts, but it’s worth underlining the scale of the issue. It’s not a small difference. Due to the extra weight (often 20+ lbs more than a non-electric bike) and the added torque from the motor, key consumables wear out at a shocking rate. Solid component durability testing shows that mid-drive e-bikes get only 1,000 miles per chain, compared to the 2,000-3,000 miles you might expect on a regular road bike. That’s double, or even triple, the wear rate.
The same principle applies to brake pads. Stopping a heavier bike traveling at higher average speeds generates more heat and requires more force, leading to faster pad wear. However, this is another area where a smart economic choice can save you money in the long run. Not all brake pads are the same. The initial price is not the whole story; the real metric to watch is the cost per 1,000 miles.
Cheaper Resin/Organic pads are quiet and wear rotors less, but they have a much shorter lifespan. More expensive Metallic/Sintered pads last longer and perform better in all weather conditions. By looking at the cost per mile, you can see that the more expensive initial purchase can actually be the cheaper option over time.
| Pad Type | Initial Cost | Lifespan (miles) | Cost per 1000 miles | Performance |
|---|---|---|---|---|
| Resin/Organic | $15-25 | 500-800 | $25-31 | Quiet, less rotor wear |
| Metallic/Sintered | $20-35 | 1,000-1,500 | $17-23 | Better heat management, all-weather |
| Semi-metallic | $18-30 | 700-1,200 | $20-26 | Balanced performance |
As the table shows, choosing the metallic pads, while a higher upfront cost, can save you nearly 30% in running costs over the life of the pads. This is the kind of data-driven decision-making that separates a budget-conscious owner from one who just buys the cheapest part available.
Key Takeaways
- Treat cheap consumables like chains as “financial fuses” that protect expensive components; replace them proactively.
- Invest in asset-protection tools like a torque wrench, where a small cost prevents catastrophic, multi-hundred-dollar failures.
- Shift your mindset from reactive repair to proactive maintenance; scheduled service and smart purchasing are always cheaper than emergency repairs.
Service Intervals: Why E-Bikes Need More Frequent Shop Visits
The final piece of the financial strategy is acknowledging the role of professional service. While a proactive owner can handle the majority of day-to-day maintenance, the complexity of an e-bike’s systems—especially the motor and battery—requires periodic expert oversight. Trying to do everything yourself to save money can backfire if you miss a developing issue that a trained mechanic would spot, or if you lack the proprietary diagnostic tools for your bike’s motor system.
The smart approach is a hybrid model. You handle the frequent, simple tasks (cleaning, lubricating, checking bolts), while a certified professional handles the less frequent, more complex tasks. This balances cost-saving with risk management. A good rule of thumb comes directly from industry experts.
Schedule professional maintenance annually or every 1,000-2,000 miles, whichever comes first. Look for certified e-bike mechanics who specialize in your brand.
– BrandEbikes Technical Team, E-bike Maintenance Guide 2025
This professional visit isn’t just a tune-up; it’s a diagnostic check-up. Mechanics can plug into the motor’s firmware, check for error codes, analyze battery health, and perform updates that are simply inaccessible to a home mechanic. This is preventative medicine for your bike’s most expensive components. The cost of this annual service is an investment in longevity. In fact, professional maintenance data shows that a $300-700 annual maintenance budget is a key factor in extending an e-bike’s functional life from 5 years to over 10. That’s halving the long-term depreciation cost of your asset.
By shifting your perspective from seeing maintenance as a cost to viewing it as an investment strategy, you take control of your e-bike’s running costs. Start implementing this proactive, financially-savvy mindset today. Your workshop manager—and your wallet—will thank you next season.