In summary:
- Watt-hours (Wh) is the most important number; it’s the total energy in the battery, like the size of a car’s gas tank.
- Amp-hours (Ah) measures current capacity, while Voltage (V) measures electrical pressure. To compare batteries, always multiply Ah x V to get Wh.
- Battery lifespan can be more than doubled by charging only to 80-90% for daily use, avoiding the chemical stress of a full charge.
- Extreme temperatures (hot and cold) are a battery’s worst enemy, drastically reducing both immediate range and long-term health.
- Simple riding habits, like maintaining proper tire pressure and using lower assist levels, can add miles of range without needing a bigger battery.
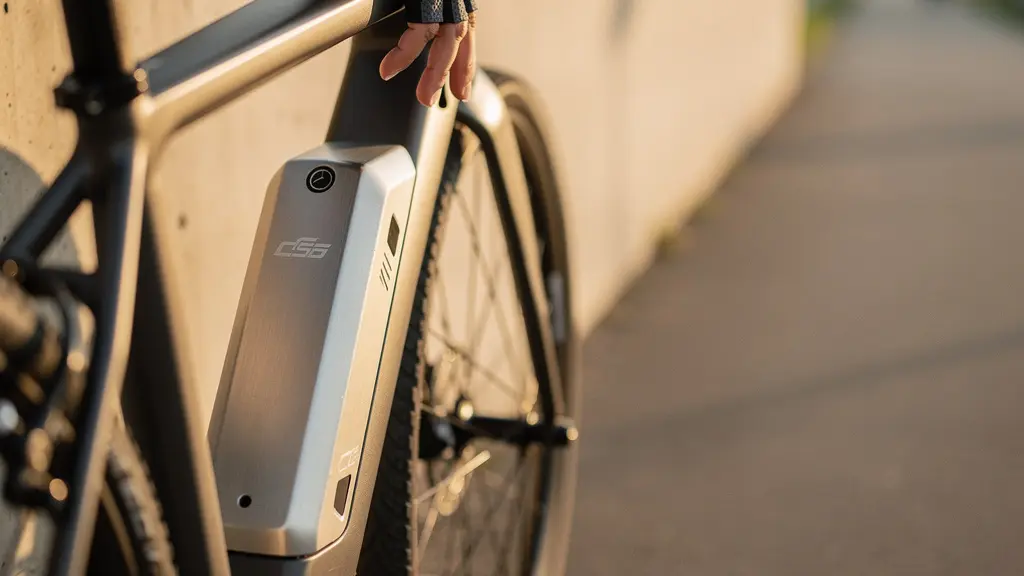
You’re comparing two e-bikes. One boasts a “500Wh battery,” while the other advertises “14Ah at 48V.” As a prospective buyer, you’re left with a critical question: which one actually gives you more range? This confusion is a common barrier for many entering the world of electric cycling. The specifications feel like a foreign language, making an apples-to-apples comparison seem impossible. You might hear the common analogy that Watt-hours (Wh) are like the size of your car’s fuel tank, which is a helpful starting point. However, this simplification barely scratches the surface of what determines real-world range and, more importantly, the long-term health and financial value of your investment.
From an engineering perspective, a battery is not a simple tank to be filled and emptied. It is a complex electrochemical system under constant stress. Understanding the relationship between Watt-hours (Wh), Amp-hours (Ah), and Voltage (V) is the first step. The true measure of a battery’s total energy is its Watt-hour rating. This is the figure that most directly correlates to potential range. You can always calculate it with a simple formula: Voltage (V) × Amp-hours (Ah) = Watt-hours (Wh). That “14Ah at 48V” battery, therefore, holds 672Wh of energy—significantly more than the 500Wh model.
But this guide goes beyond simple arithmetic. We will delve into the physics that govern your battery’s performance. We’ll explore why a battery’s capacity plummets in the cold, how to accurately estimate your range over hilly terrain, and the critical importance of storage charge. The goal is to empower you not just to read a spec sheet, but to truly understand the forces at play. By mastering a few key principles of battery management, you can actively influence your range on every ride and dramatically extend the lifespan of your e-bike’s most expensive component.
This article provides a comprehensive breakdown of everything you need to know. From the science behind battery degradation to practical tips for maximizing every charge, the following sections will equip you with the knowledge to ride farther and keep your battery healthy for years to come.
Contents: How to Master Your E-Bike Battery
- Why Your Battery Dies Faster in Freezing Temperatures
- How to Estimate Range Based on Elevation Gain and Weight
- Dual Battery vs Spare Battery in Backpack: Which Is Better?
- The Risk of Leaving Your Battery at 0% for Months
- Storage Charge: Why 60% Is the Sweet Spot for Longevity
- Charging to 80%: The Secret to Doubling Battery Lifespan
- Why Recycling Lithium Batteries Is Still a Logistical Nightmare
- How to Get 10 Extra Miles of Range Without Charging
Why Your Battery Dies Faster in Freezing Temperatures
One of the most jarring experiences for a new e-bike owner is the dramatic drop in range during the first cold snap of winter. A battery that reliably delivers 40 miles in the summer might struggle to provide 25 in the winter. This isn’t a fault; it’s a predictable consequence of electrochemistry. At its core, a battery generates power by facilitating the flow of lithium ions through a liquid medium called an electrolyte. In cold weather, this electrolyte becomes more viscous, like syrup thickening in a refrigerator. This increased viscosity physically slows down the movement of ions, which in turn increases the battery’s internal resistance.
This higher internal resistance has two major negative effects. First, it makes it harder for the battery to deliver power, causing a phenomenon known as voltage sag. The bike’s controller reads this lower voltage and may shut off power prematurely, even if there’s still energy left in the cells. Second, a significant portion of the battery’s energy is wasted as heat trying to overcome this resistance, rather than being used to power the motor. The effect is substantial; an academic study confirms that a battery providing 100% capacity at 27°C will deliver only 50% at –18°C. Protecting your battery from the cold is therefore crucial for winter riding.

The key takeaway is to manage your battery’s temperature. Never charge a frozen battery, as this can cause permanent damage through lithium plating on the anode. Always bring the battery indoors to warm up to room temperature before plugging it in. Using a neoprene battery cover during rides can also help insulate it and retain some of the heat it generates internally, slowing down the performance drop. By understanding the underlying physics, you can anticipate the range reduction and take steps to mitigate it.
How to Estimate Range Based on Elevation Gain and Weight
While battery capacity (Wh) is the primary determinant of range, it’s a theoretical maximum. Real-world range is a function of energy consumed, and nothing consumes energy like fighting gravity. The total weight of the rider, bike, and cargo, combined with the elevation gain of a route, are the two most significant variables after speed and temperature. For every pound you add and every foot you climb, the motor must draw more watts from the battery. This is why manufacturers’ range estimates, often based on a lightweight rider on flat ground with no wind, can feel wildly optimistic.
A more effective way to predict range is to think in terms of “Watt-hours per mile” (Wh/mi). This metric tells you how much energy you’re consuming. While it varies constantly, you can develop an intuition for it. For instance, a casual ride on a flat bike path might consume 10-15 Wh/mi, while aggressive mountain biking on steep trails could easily demand 25-30 Wh/mi. By dividing your battery’s total capacity by your estimated consumption, you get a much more realistic range estimate. A 500Wh battery might give you 50 miles on the flats (500Wh / 10 Wh/mi), but only 20 miles in the mountains (500Wh / 25 Wh/mi).
For a more precise calculation, a useful engineering rule of thumb is to account for climbing. According to analysis from e-bike specialists, for every 100 metres of elevation gain, a battery uses an extra 10 to 15 watt-hours. If your route includes 1,000 metres of climbing, you must subtract an additional 100-150Wh from your battery’s capacity right off the top before even considering the distance you’ll travel. This helps explain why a short, hilly 15-mile ride can drain a battery just as much as a flat 40-mile ride.
| Terrain / Condition | Avg. Wh/mile | Est. Range (500Wh Battery) | Range Reduction vs. Flat |
|---|---|---|---|
| Flat pavement, ideal conditions | 10 Wh/mi | ~50 miles | Baseline |
| Mixed terrain (light hills, some gravel) | 15–20 Wh/mi | ~25–33 miles | 30–50% |
| Hilly terrain (significant elevation) | 20–25 Wh/mi | ~20–25 miles | 50–60% |
| Mountain biking / off-road trails | 25–30 Wh/mi | ~17–20 miles | 60–66% |
| Headwind (15+ mph) on flat | 15–20 Wh/mi | ~25–33 miles | 30–50% |
Dual Battery vs Spare Battery in Backpack: Which Is Better?
Once you understand the factors limiting your range, the logical next step for long-distance riders is to consider carrying more energy. This presents a choice: a purpose-built dual-battery system integrated into the bike’s frame, or simply carrying a spare battery in a backpack. From a pure capacity standpoint, both achieve the same goal. However, from an engineering and safety perspective, the integrated dual-battery system is vastly superior for several critical reasons.
The primary issue is the center of gravity. A spare battery is a dense object, weighing between 3 to 5 kilograms (7-11 lbs). When placed in a backpack, this weight is positioned high up on the rider’s back, significantly raising their combined center of gravity. This makes the bike less stable, more difficult to handle in corners, and more susceptible to balance shifts, particularly on uneven or off-road terrain. In contrast, a frame-mounted dual-battery system keeps this mass low and centered, preserving the bike’s intended handling characteristics. The weight is distributed on the frame, where it is barely noticeable, rather than being carried on your shoulders and spine.
Furthermore, safety during a crash is a major concern. A battery in a backpack becomes a dense, heavy projectile pressed against your spine. The potential for serious injury is significant. Integrated systems are designed and tested within the frame’s structure for crash protection. They also offer seamless operation, with the bike’s Battery Management System (BMS) automatically drawing power from both packs and balancing their charge. A spare battery requires you to stop, dismount, and manually swap the packs, which is inconvenient and interrupts the flow of a ride. While a spare battery is a cheaper and more flexible option that can be added to any bike, the trade-offs in handling, safety, and convenience are substantial.
| Criteria | Frame-Mounted Dual Battery | Spare Battery in Backpack |
|---|---|---|
| Center of Gravity | Low and centered — stable handling | High on rider’s back — impairs balance |
| Seamless Power Switching | Automatic switching at ~5% difference | Manual stop, dismount, and swap required |
| Crash Safety | Engineered protection within the frame | Dense 3–5 kg mass pressed against spine |
| Added Weight Perception | Distributed on bike frame, minimal feel | Full weight on shoulders and back |
| Retrofittable | No — must be factory-equipped | Yes — works with any compatible battery |
| Cost | High (included in premium bike price) | Lower (cost of spare battery + bag) |
| Trail / Off-Road Suitability | Excellent — no impact on agility | Poor — weight shifts during maneuvers |
The Risk of Leaving Your Battery at 0% for Months
Perhaps the most destructive thing you can do to a lithium-ion e-bike battery is to leave it in a fully discharged state (0%) for an extended period. This act can lead to a condition known as “bricking,” where the battery becomes permanently unable to accept a charge. This happens because even when the display reads “empty,” the Battery Management System (BMS) inside the pack continues to draw a tiny amount of power, known as a parasitic or “vampire” drain. This drain is necessary to monitor cell health and protect against shorts.
Over weeks or months, this small but constant drain will pull the voltage of the individual cells below their critical minimum-safe level, typically around 2.5V per cell. Once a cell’s voltage drops below this threshold, irreversible chemical reactions begin to occur, including the dissolution of the copper anode. When you later attempt to charge the battery, the BMS will detect the dangerously low voltage and, as a safety precaution, refuse to initiate a charge to prevent a potential fire or explosion. At this point, the battery is effectively a “brick.”
This is a common cause of premature battery failure, which needlessly shortens its lifespan. According to a guide on battery care, while most e-bike batteries are rated for 500-1,000 charge cycles, improper storage at 0% is one of the top reasons they fail long before reaching that number. The damage from deep discharge is cumulative and represents a significant financial loss, given that a replacement battery can cost hundreds or even thousands of dollars. Preventing this is a simple matter of proper storage discipline.
Your Action Plan: 5 Steps to Prevent Battery ‘Bricking’ During Storage
- Never store your e-bike battery at 0% — the BMS’s “vampire drain” will push voltage below the critical recovery threshold over time.
- Charge the battery to a storage level of 40–60% before any period of inactivity longer than two weeks.
- Remove the battery from the bike to prevent additional parasitic drain from the bike’s own electronics.
- Check the charge level every 2–3 months during long-term storage and top it back up to the 40–60% range if it has dropped.
- Store the battery in a cool, dry indoor location (10–20°C / 50–68°F), away from freezing temperatures or extreme heat.
Storage Charge: Why 60% Is the Sweet Spot for Longevity
Just as leaving a battery at 0% is harmful, storing it at 100% for long periods also accelerates its degradation, a process known as calendar aging. A fully charged lithium-ion cell is in a state of high chemical stress. The voltage is at its peak, which puts a strain on the internal components, particularly the electrolyte and cathode. This stress is significantly amplified by high temperatures. This combination of a high state of charge and heat is the single most damaging scenario for a battery’s long-term health.
Research from battery experts shows that the worst situation is keeping a fully charged battery at elevated temperatures. The ideal storage condition is a cool environment (around 15°C / 60°F) and a partial state of charge. The industry has largely settled on a range of 40-60% as the optimal “storage charge.” At this level, the cell voltage is low enough to minimize chemical stress, but high enough to provide a large buffer against self-discharge and the parasitic drain from the BMS, preventing it from ever reaching the damaging 0% state. This is precisely why electric vehicles often have a “long-term parking” mode that holds the battery at around 50%.
Case Study: The 40-80 Rule for Extending Battery Life
The “40-80 Rule” is a widely adopted battery management strategy that applies to both daily use and storage. For daily riding, it involves keeping the battery’s state of charge between 40% and 80%, avoiding both the high-stress zone above 80% and the deep-discharge risk below 40%. For storage, the rule is to leave the battery idle at a charge level between 40% and 60%. E-bike riders who adopt this discipline can expect a significant extension of their battery’s cycle life—often by thousands of cycles—because it consistently avoids the conditions that cause the most rapid chemical degradation. This principle is broadly applicable to all common lithium-ion chemistries used in e-bikes today.
Charging to 80%: The Secret to Doubling Battery Lifespan
The principle of avoiding high-voltage stress extends beyond long-term storage and applies directly to your daily charging routine. While it may feel intuitive to charge your battery to 100% before every ride, this habit is one of the primary drivers of premature capacity loss. The final 10-20% of the charging process (from 80% to 100%) puts the most strain on the battery’s chemistry. Holding the cells at their peak voltage (around 4.2V per cell) accelerates the degradation of the electrolyte and cathode materials, permanently reducing the battery’s ability to hold a charge.
The quantitative impact of this is staggering. Extensive laboratory testing provides clear data: according to research published by Battery University, a lithium-ion cell charged to only 4.0V/cell (~80%) delivers 1,200–2,000 cycles, which is two to four times the 300-500 cycles it would get when regularly charged to 100% (4.20V/cell). This means that by forgoing the last 20% of range on most days, you can potentially double or even quadruple your battery’s total lifespan. For most daily commutes or recreational rides, that top 20% of capacity is rarely needed. The trade-off—a slightly shorter daily range for a dramatically longer service life—is one of the best investments you can make in your e-bike.
Implementing this strategy is straightforward. Many modern e-bikes and smart chargers now include a “longevity mode” or a setting to cap the charge at 80% or 90%. If your system lacks this feature, a simple mechanical outlet timer is an effective low-tech solution. By determining how long a full charge takes, you can set the timer to cut power after about 70-80% of that time has elapsed. The rule should be to only charge to 100% intentionally, right before a planned long ride where every mile counts.
- Check for built-in features: Many new e-bikes offer an 80% charge limit in their settings or companion app.
- Use an outlet timer: A simple, effective way to stop the charge process automatically.
- Embrace shallow top-ups: Frequent, partial charges (e.g., from 40% to 75%) are far gentler on the battery than full, deep cycles.
- Charge to 100% only when necessary: Reserve a full charge for epic rides, and try to ride soon after the charge completes to get it out of the high-stress zone.
- Never leave it at 100% overnight: Holding peak voltage for hours is a key driver of calendar aging.
Why Recycling Lithium Batteries Is Still a Logistical Nightmare
As the e-bike market booms, the question of what to do with batteries at the end of their life becomes increasingly urgent. While we might imagine a clean, circular economy where old batteries are easily turned into new ones, the reality is far more complex. From an engineering and regulatory standpoint, recycling lithium-ion batteries is a logistical and financial challenge. The core problem is that, for transport purposes, lithium-ion batteries are classified as dangerous goods due to their fire risk. This classification imposes strict and expensive regulations on their collection, shipping, and handling.
The cost of safely transporting a single spent e-bike battery to a specialized recycling facility can often exceed the value of the raw materials—like cobalt, lithium, and nickel—that can be recovered from it. The recycling process itself is also energy-intensive, typically involving either high-temperature pyrometallurgy (smelting) or complex hydrometallurgy (using acids to leach out metals). These processes are only economically viable at a very large scale, and the distributed, consumer-level nature of e-bike batteries makes efficient collection a significant hurdle.
This has led to the rise of a crucial intermediate step in the battery lifecycle: the “second-life” market. This approach recognizes that a battery is often considered “dead” for a demanding application like an e-bike when its State of Health (SOH) drops to around 70-80% of its original capacity. While it can no longer provide adequate range for cycling, it still holds a substantial amount of energy. These retired batteries are increasingly being repurposed for less demanding stationary uses, extending their value and delaying the need for costly recycling.
Case Study: Second-Life Batteries from E-Bikes to Home Energy Storage
An e-bike battery is typically retired when its capacity falls below 80%, as the reduced range becomes impractical for a rider. However, this “spent” battery is still a valuable asset. The growing second-life industry collects these retired batteries, tests and sorts the cells, and re-packages them into larger arrays for stationary energy storage. These second-life systems are perfect for applications like storing excess energy from home solar panels or providing backup power. This innovative approach extracts several more years of useful service from the battery cells, effectively bridging the gap between their “first life” on the road and their eventual, complex recycling.
Key takeaways
- Watt-hours (Wh) is your “gas tank”: Always use Wh (Volts x Amp-hours) as the true measure to compare the total energy capacity between different e-bike batteries.
- Your habits dictate lifespan: Charging to 80% for daily use, storing at 60%, and avoiding extreme temperatures can more than double your battery’s service life, saving you significant replacement costs.
- Range is a calculation, not a single number: Real-world range depends heavily on your weight, elevation gain, speed, and tire pressure. Learning to estimate your “Wh per mile” consumption is key to conquering range anxiety.
How to Get 10 Extra Miles of Range Without Charging
While understanding battery specs and health is crucial, you can also significantly boost your range on any given ride by changing how you interact with the bike. It’s not just about how much energy you have, but how efficiently you use it. Adopting a few simple techniques can easily add 5, 10, or even more miles to your typical range, all without buying a bigger battery. The single biggest factor you control is speed. Air resistance increases exponentially with speed, meaning the motor has to work much harder to maintain 25 mph than it does to maintain 15 mph. In fact, real-world tests show that riding at high speeds can reduce range by 40-50% compared to a moderate pace.
Another key technique is using your gears effectively to maintain an optimal pedaling cadence, typically between 60-80 RPM. This keeps the motor spinning in its most efficient range, much like keeping a car’s engine at its ideal RPM. “Mashing” a high gear at a low cadence forces the motor to draw excessive current, wasting energy. Smooth, consistent pedaling in the right gear works with the motor, not against it. Additionally, paying attention to rolling resistance is free mileage. Simply ensuring your tires are inflated to the manufacturer’s recommended pressure can reduce motor strain and add miles to your range over the course of a single charge.

Combining these strategies transforms you from a passive passenger into an active manager of your energy consumption. Use the highest assist levels only when you truly need them—for steep hills or accelerating from a stop—and ride in Eco or a lower assist mode on flat terrain. By being mindful of your speed, cadence, and tire pressure, you can consistently squeeze more distance out of every single Watt-hour your battery holds.
Your Action Plan: 7 Proven Techniques to Maximize E-Bike Range
- Find your efficiency sweet spot — ride at 12-15 mph instead of 20+ mph, as higher speeds dramatically increase energy consumption.
- Maintain a steady pedaling cadence of 60-80 RPM using your gears to keep the motor in its peak efficiency range.
- Use the ‘Pulse and Glide’ technique: accelerate with assist, then coast to conserve energy on flat sections.
- Check tire pressure weekly and inflate to the recommended PSI to minimize rolling resistance.
- Adopt a slight aerodynamic ‘micro-tuck’ body position on fast sections to reduce air drag.
- Use Eco mode on flat terrain and save higher assist levels for hills or strong headwinds.
- Carry cargo in low-mounted panniers instead of a backpack to improve aerodynamics and center of gravity.